Different Ways to Cut Grooves
The weather was a little unsettled today, with rain in the morning. It stopped in the afternoon, and the chilly morning air became a little milder. I had planned to continue attaching the panels from yesterday, but the humidity was high in the morning, so I waited until the weather improved in the afternoon. This completes the assembly of the wide puzzle boxes. Next comes the finishing process. Most of today’s work was making parts for the 5-sun 27-steps puzzle boxes.
The axis panels are already finished, so today I continued making the long side panels and prepared the wood for the other parts. As I mentioned earlier, the long side panels were being glued and pressed in a vise as part of the preparation. After cutting them to length, I cut the grooves for the side Aruki sliding panels, in addition to the grooves already made for the top and bottom Aruki panels. When cutting these grooves, I match them to the Aruki panel material I will use for that batch. The Aruki panels for a 27-steps box are 8.5 mm thick, so I keep a small piece of 8.5 mm board as a guide for positioning the grooves for the top and bottom panels. That works well for the top panel, but for the side Aruki panels, I believe it is best to use the actual boards. Unlike the top and bottom panels, the side panels cannot allow even the slightest difference in position for a particular reason. I will explain that in more detail another time. For this reason, I always use the actual Aruki panel boards for the batch to determine the groove positions. So today, while finishing the long side panels, I also prepared the wood for the Aruki panels and planed it to the required thickness.
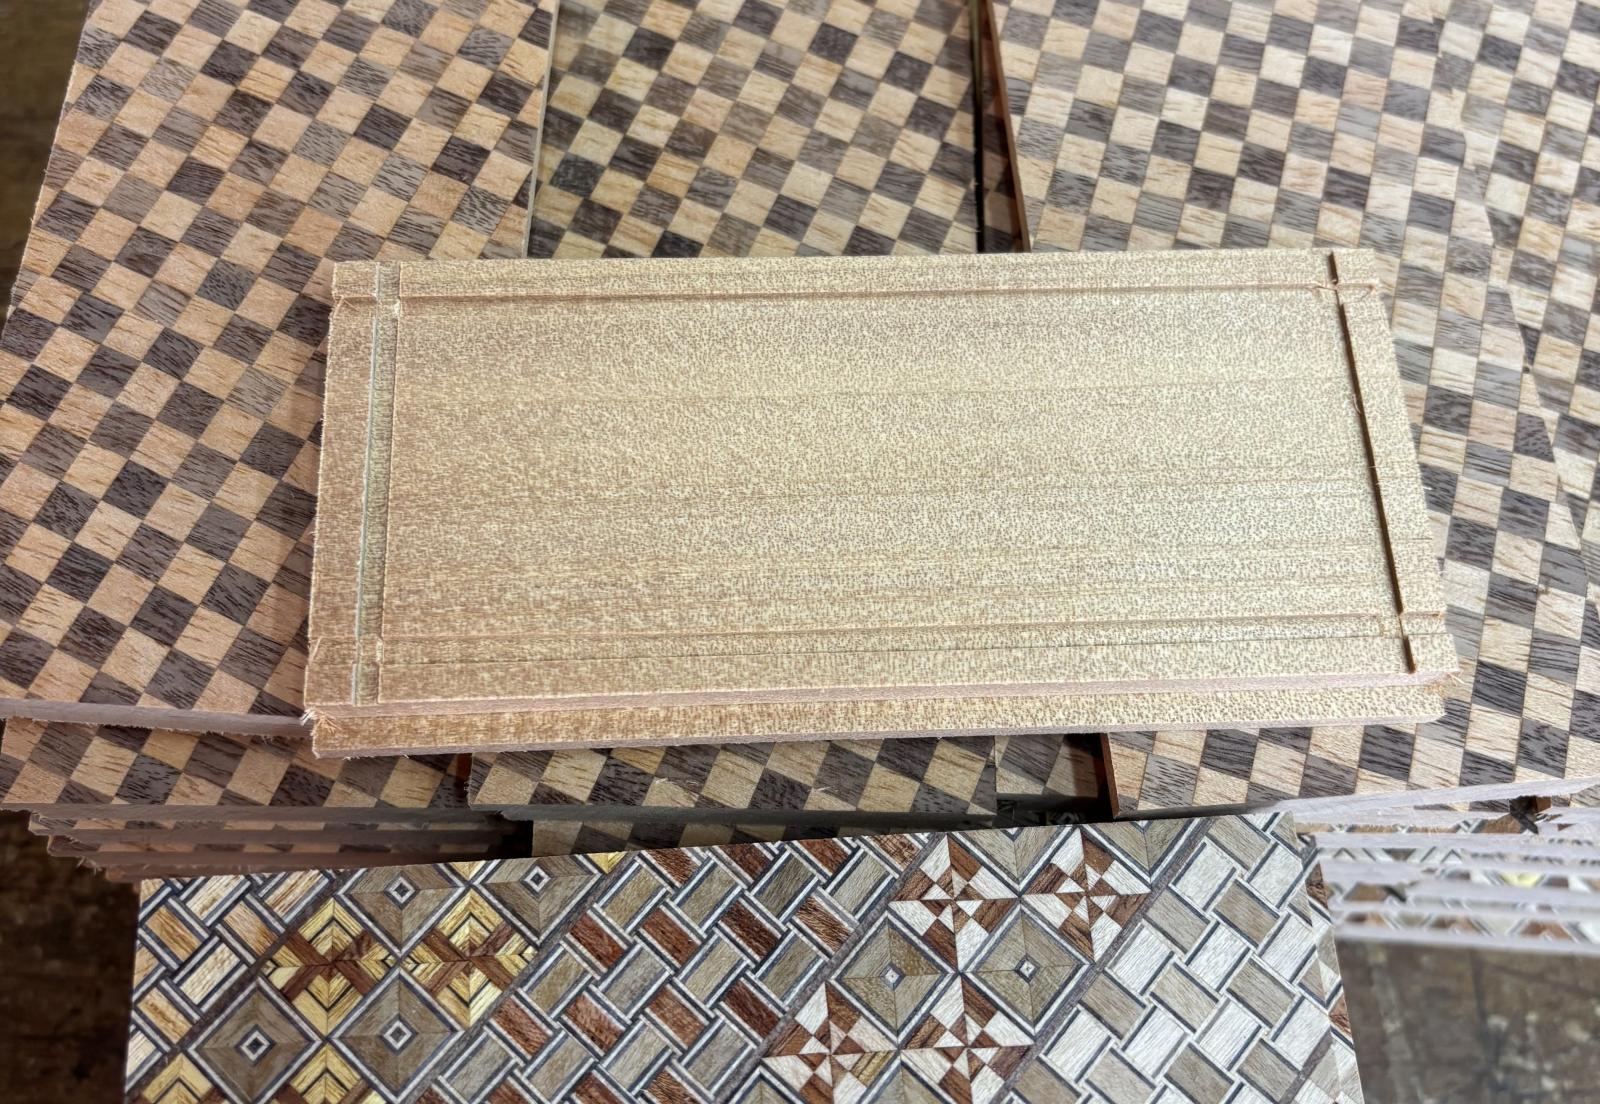
The photo shows the long side panels I worked on today and their grooves. Of the four grooves, the two long ones at the top and bottom had already been cut. Today, I cut the shorter ones. Cutting these grooves at the same depth from one end to the other has become standard practice today. However, in older Japanese puzzle boxes, the grooves often stopped before reaching the end. I am not sure whether I should call this the original method, but the grooves did not pass all the way through. If you are familiar with Mame puzzle boxes, you may have seen this type of groove. The stopped end prevents the panel from sliding out. However, the internal mechanism can also stop the panel, so many boxes today have grooves that run all the way through. Compared with older puzzle boxes, this leaves parts of the grooves unnecessarily visible, which some people may find less attractive. Still, this method makes machining easier and production more efficient. Personally, though, I feel that the older method gave the Aruki panels greater stability.
Have a great weekend!