Precise Glue Application
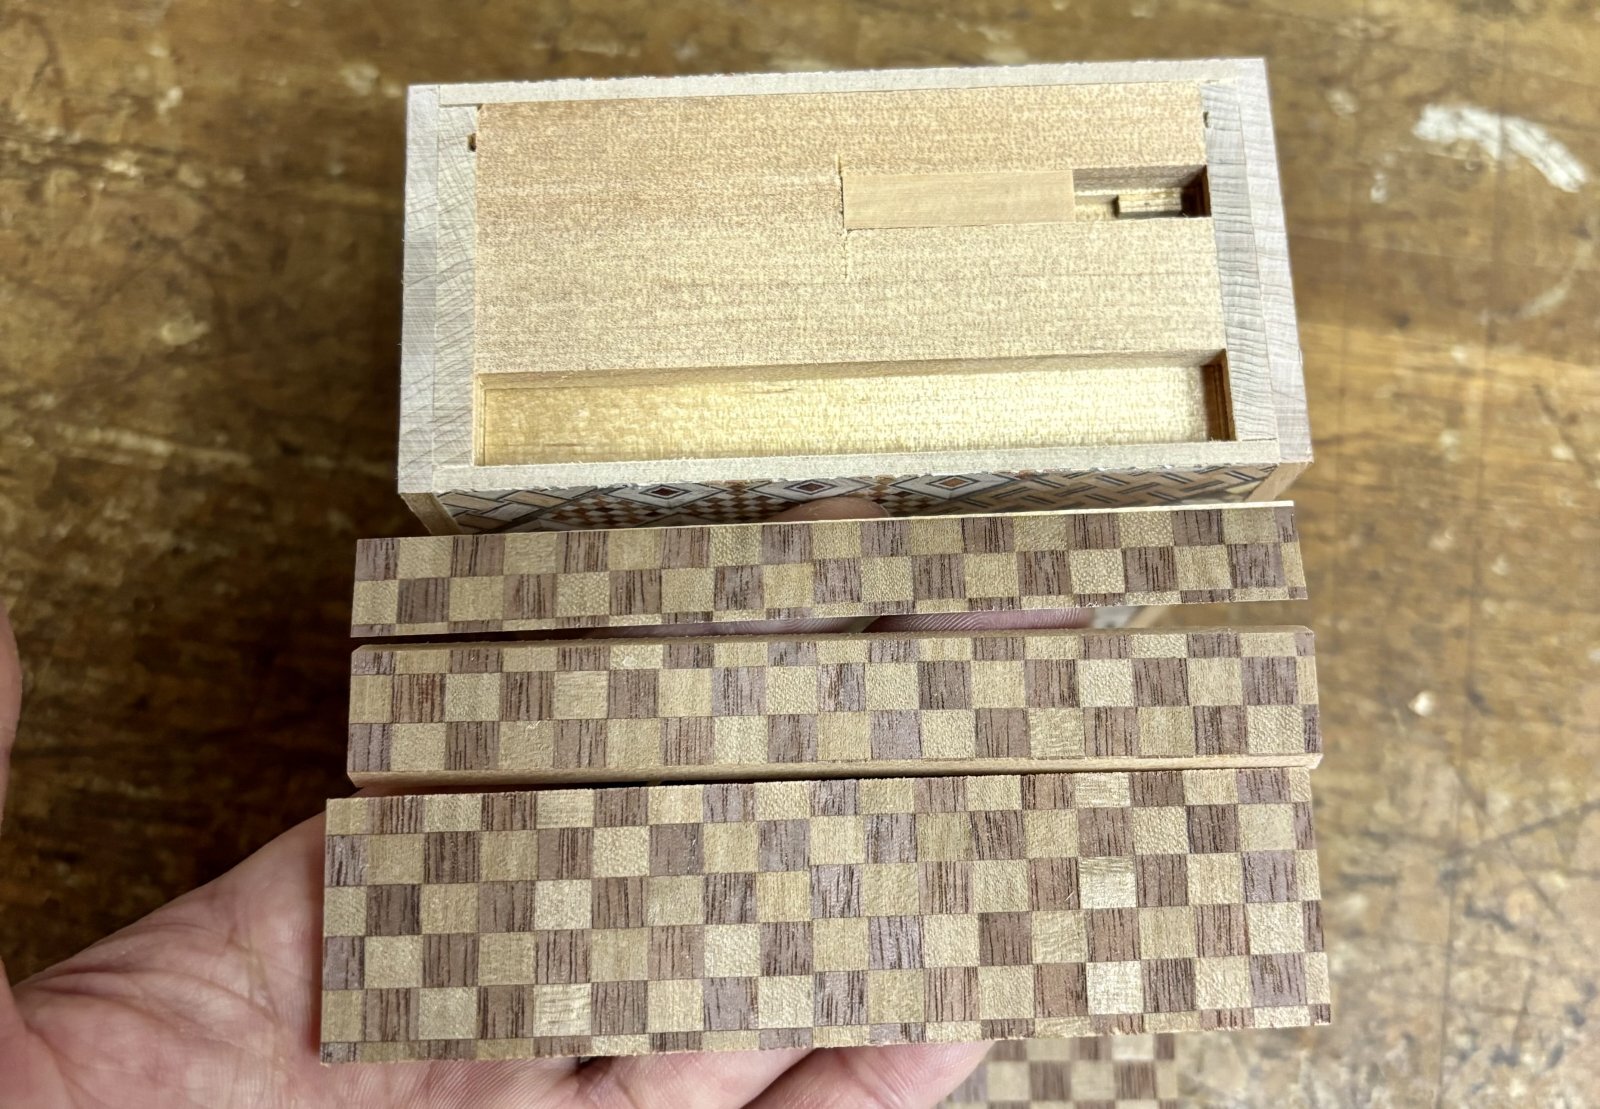
It was cool again this morning, and it felt quite chilly. It was not winter cold, of course, but compared with the warm days we have had, it felt much colder. The sky was cloudy and looked as though it might rain, but the humidity was not very high, so I went ahead with attaching the sliding key panels and working on the 5-sun puzzle boxes. I plan to attach the panels today and tomorrow, so I’m hoping the rain will hold off and the humidity will stay low...
The photo shows the sliding key. As I also showed on Instagram the other day, this panel is quite long from side to side. The ends of a panel like this can easily lift up, so I take extra care when attaching it. As you can see in the photo, the area at the very edge of the box must be left free of glue. If the sliding key sticks to this area, the mechanism will not move. However, as I mentioned, the ends of the panel can warp upward, so the position of the glue is especially important. To give the panel as much glued surface area as possible, I apply glue right up to the boundary of the area that must remain unglued. This work relies very much on feel. Like many steps in making puzzle boxes, it depends on the judgment developed through experience. It is one of those tasks that is difficult to do in a fixed, mechanical way. One way to make the gluing more efficient is to make a jig. You place it against the surface to mark where the glue should go, then apply the glue along it. This allows you to put the glue in roughly the same position on every box. In fact, I do not use a jig for this particular task. I apply the glue by hand each time, relying on feel. Partly because I can be a little lazy about making one!..haha. But working this way also has the advantage of being faster for me.
After that, I made just the axis panels to move the 5-sun 27-steps puzzle boxes forward a little. The long side panels are still being pressed in a vise, so I have not started working on them yet. However, I often make the axis panels using measurements alone. By this stage, the long side panels have grooves for the top and bottom Aruki sliding panels. Since this is a 27-steps model, there is a groove at both the top and bottom. I determine the dimensions of the axis panels so that they fit between these grooves. However, if you have seen the inside of one of my boxes, you may know that I do not make the axis panels fit exactly into the full space between the grooves. For example, if the long side panel is 60 mm high and both Aruki panels are 8.5 mm thick, the calculation is 60 − 8.5 − 8.5 = 43 mm. This gives an axis panel height of 43 mm, but in practice, I make it around 42 mm or 41.5 mm. The parts can shift slightly during assembly, and glue can squeeze out. If even a little of the axis panel or glue extends into the grooves, the top and bottom Aruki panels may become harder to move or stop moving altogether. For this reason, I leave a little clearance in various parts of the box, not just around the axis panels. However, I keep this clearance to the minimum needed. Too much can weaken the structure or make the box look less attractive.