Unique Mame Panel Feature
The rain that started last night continued for quite a while, and although it was mostly light, it fell on and off throughout the day. The temperature was certainly lower than usual, reaching only about 26°C, but since it is still summer, it was fairly warm. Perhaps because of the humidity, it did not feel as cool as I had expected.
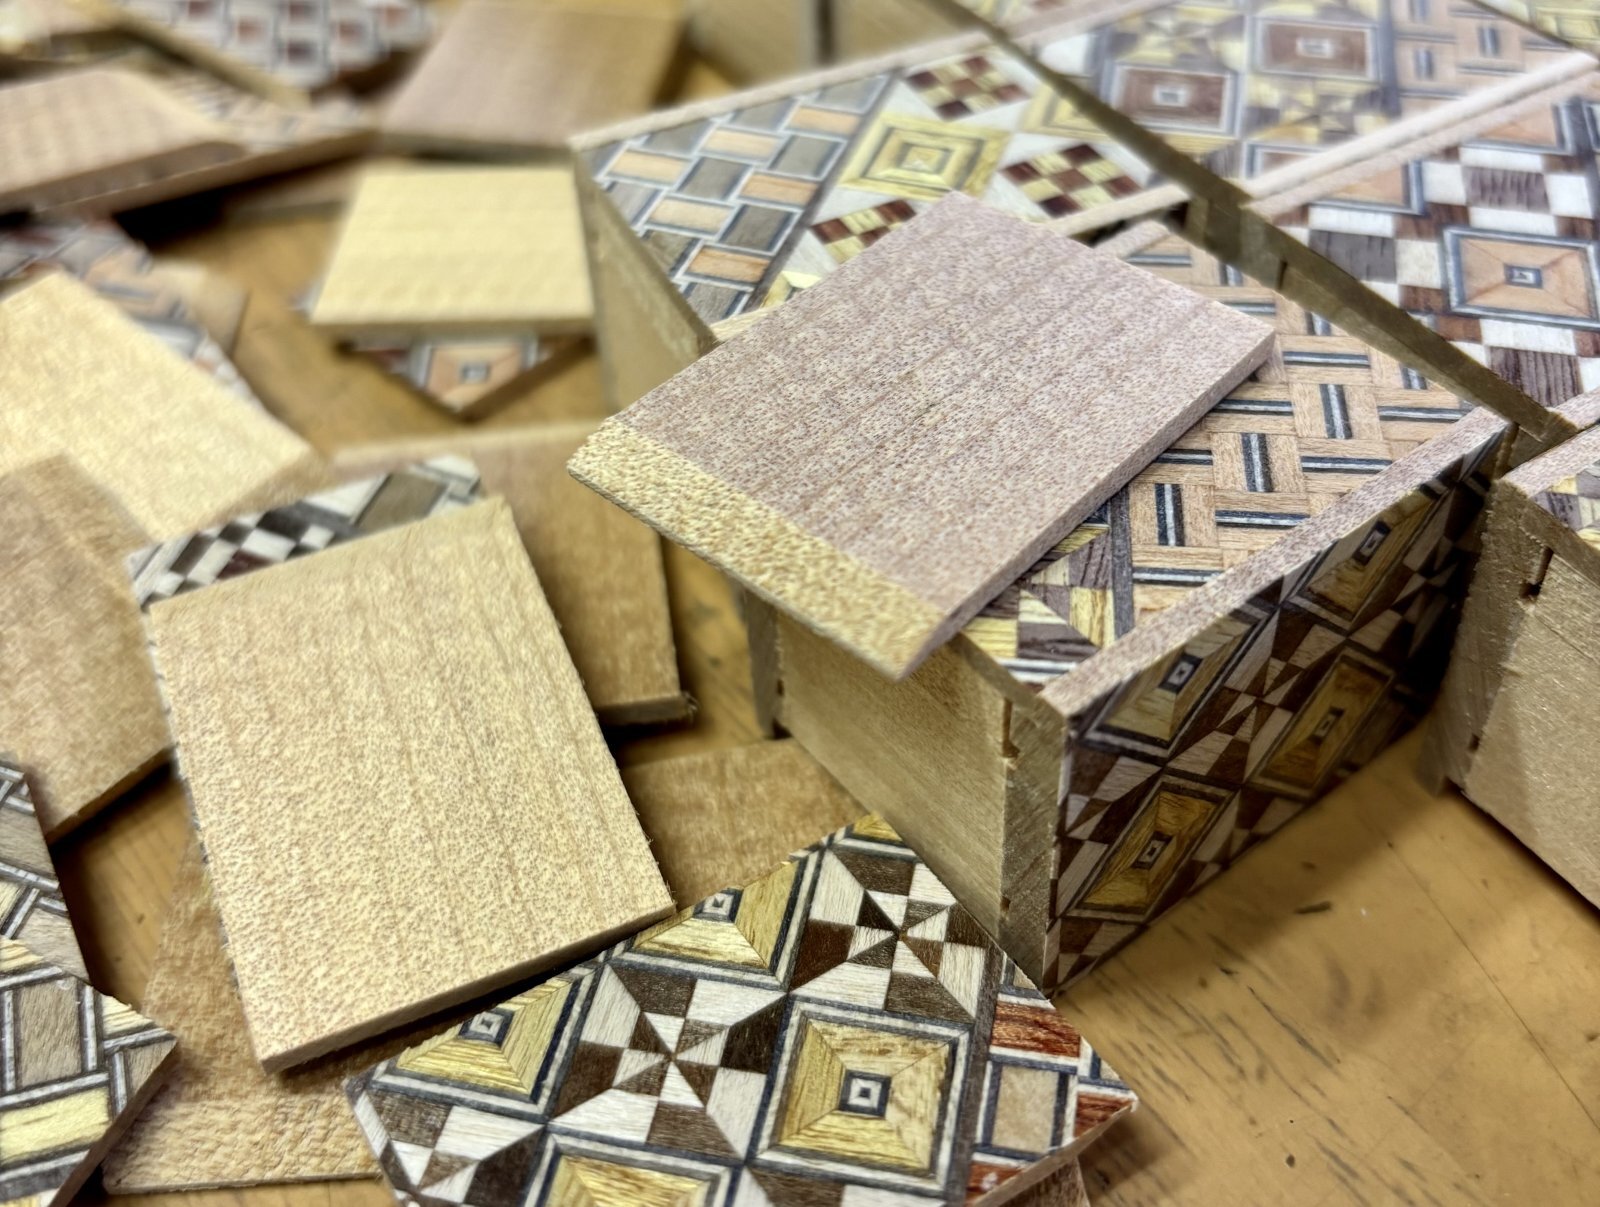
There were occasional breaks in the clouds, so I attached the Yosegi panels to the Mame puzzle boxes. I felt that the humidity was low enough for this work.At the same time, I also made the panels for the 4-sun 12-step puzzle boxes, which I had put on hold a few days ago. I am making only ten of these to fill made-to-order requests. Cutting the top and bottom panels requires a slightly different method, so it is easier to make everything that uses the same process at the same time.The panels for the 4-sun puzzle boxes are simply cut to size, but the panels for the Mame puzzle boxes require one additional step after they have been cut. As you can see in the photo, I trim the underside of the front edge at an angle. This is a unique feature of the Mame puzzle box and is essential for the mechanism to work. You may have noticed that the top and bottom panels of regular puzzle boxes (10,12 0r 14 steps) with sliding keys are often trimmed in a similar way. However, the purpose is different. On a regular puzzle box, this cut is mainly for appearance and a smoother feel, since a sharp edge is less comfortable to touch. The box would still work without it. On a Mame puzzle box, however, this angled cut is essential. Without it, the mechanism will not work properly.
In other words, this extra machining is necessary because the movement of the Mame puzzle box mechanism is very small. It is needed for the first movement of both the top and bottom panels. In the opening sequence, that means the first move for the top panel and the fourth move for the bottom panel. If this area is not shaved down, the panel will not move. The panel that moves just before it travels only about 1.4 mm, while the panel itself is a little over 2 mm thick, so without this adjustment the two parts would catch against each other. That is why I intentionally make this area thinner. The amount I remove is actually slightly different depending on the mechanism, and I shave a little more for the 18-step version. However, if I remove too much, the tip becomes very thin and can break easily. In the past, I was sometimes too cautious about shaving this area, and the mechanism caught and did not move smoothly. For that reason, I always adjust this part very carefully.
There were occasional breaks in the clouds, so I attached the Yosegi panels to the Mame puzzle boxes. I felt that the humidity was low enough for this work.At the same time, I also made the panels for the 4-sun 12-step puzzle boxes, which I had put on hold a few days ago. I am making only ten of these to fill made-to-order requests. Cutting the top and bottom panels requires a slightly different method, so it is easier to make everything that uses the same process at the same time.The panels for the 4-sun puzzle boxes are simply cut to size, but the panels for the Mame puzzle boxes require one additional step after they have been cut. As you can see in the photo, I trim the underside of the front edge at an angle. This is a unique feature of the Mame puzzle box and is essential for the mechanism to work. You may have noticed that the top and bottom panels of regular puzzle boxes (10,12 0r 14 steps) with sliding keys are often trimmed in a similar way. However, the purpose is different. On a regular puzzle box, this cut is mainly for appearance and a smoother feel, since a sharp edge is less comfortable to touch. The box would still work without it. On a Mame puzzle box, however, this angled cut is essential. Without it, the mechanism will not work properly.
In other words, this extra machining is necessary because the movement of the Mame puzzle box mechanism is very small. It is needed for the first movement of both the top and bottom panels. In the opening sequence, that means the first move for the top panel and the fourth move for the bottom panel. If this area is not shaved down, the panel will not move. The panel that moves just before it travels only about 1.4 mm, while the panel itself is a little over 2 mm thick, so without this adjustment the two parts would catch against each other. That is why I intentionally make this area thinner. The amount I remove is actually slightly different depending on the mechanism, and I shave a little more for the 18-step version. However, if I remove too much, the tip becomes very thin and can break easily. In the past, I was sometimes too cautious about shaving this area, and the mechanism caught and did not move smoothly. For that reason, I always adjust this part very carefully.