Attaching the Four Panels
It became a little cooler last night, and it looks like the weather will stay fairly comfortable for the next few days. Perhaps thanks to the rain that has fallen almost every evening, the temperature did not even reach 30°C today. Today is Mountain Day, a national holiday in Japan, and for many people it also marks the beginning of the Obon holiday. Most people will be on holiday until around August 16. During this time, many families visit their ancestors' graves to pay their respects and clean them, so cemeteries can become quite crowded. Because of that, my family and I decided to visit and clean our family grave later this month instead. In Japan, our ancestors' ashes are usually kept in family graves. Many homes also have a Butsudan, a traditional Buddhist family altar, where people offer flowers and pay their respects to their ancestors.
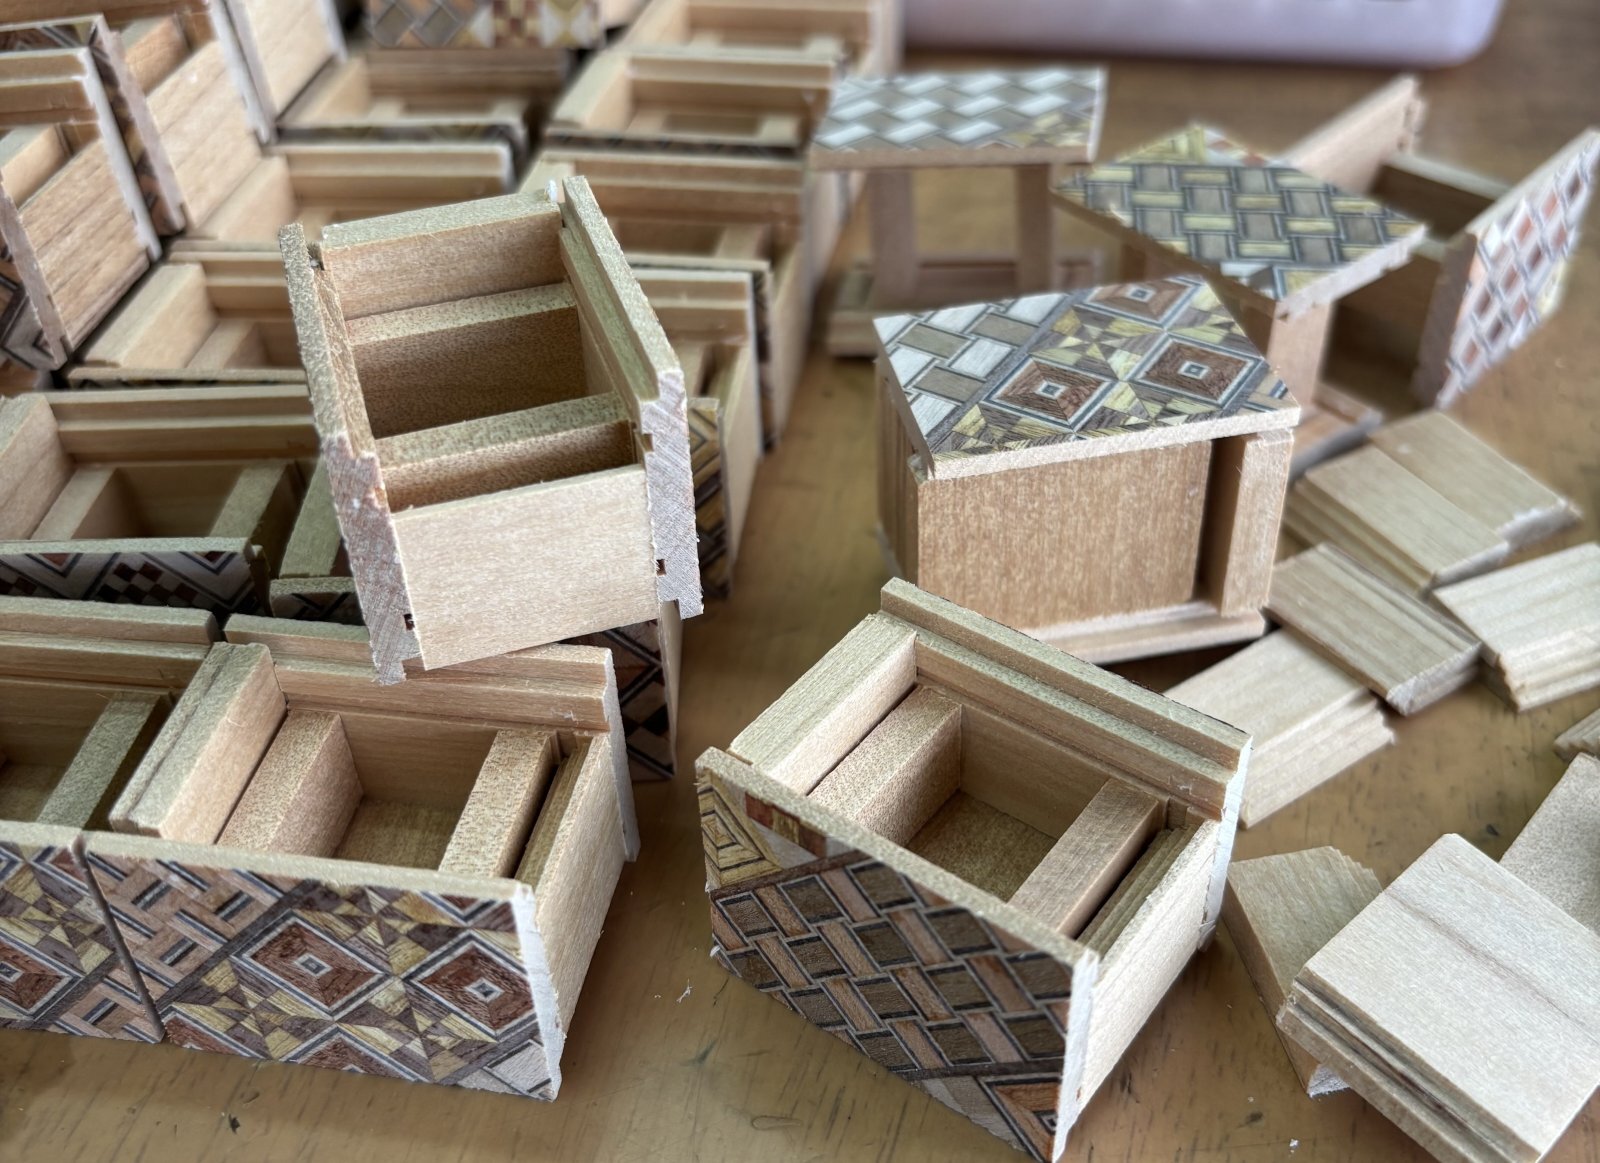
The photo shows the Aruki sliding panels being attached to the Mame puzzle boxes. As I mentioned yesterday, I finished making the Aruki panels for the 18-step Mame puzzle boxes. Each box has four Aruki panels. The top and bottom panels are the same, while the two smaller side panels are different. The only difference is their length—the stepped mechanism is the same on both. The shorter panel is the one that moves first. When attaching the panels, I first slide them to their maximum travel to check the movement. If I simply install them without doing this, it becomes much more difficult to adjust the movement later. Of course, I check the movement again at the end, but at this stage I already adjust it so that it is close to the feel I am aiming for. The movement of a Mame puzzle box changes very little during the remaining assembly process, so the adjustment made here is already very close to the final result. Because the box is so small, the panels need to move with only a very light touch to achieve a smooth sliding action.
You can attach the panels in any order, but I usually start with the smaller side panel, then the larger side panel, followed by the bottom panel, and finally the top panel. The top panel is the one that can still be adjusted the most later, so at this stage I only check that it is not too loose. If I install the large top and bottom panels first, they get in the way when I check the movement of the side panels, so I always attach the side panels first. The bottom panel is actually better if it is slightly loose, but it should never be wobbly. Once all four panels are attached, it becomes difficult to tell which side is the top, so I make a small mark on the top side. In the end, similar Yosegi panels will be attached to both sides, so the assembly process is the same either way. However, I like to use a brighter Yosegi pattern with finer details for the top, so this mark is important.
The photo shows the Aruki sliding panels being attached to the Mame puzzle boxes. As I mentioned yesterday, I finished making the Aruki panels for the 18-step Mame puzzle boxes. Each box has four Aruki panels. The top and bottom panels are the same, while the two smaller side panels are different. The only difference is their length—the stepped mechanism is the same on both. The shorter panel is the one that moves first. When attaching the panels, I first slide them to their maximum travel to check the movement. If I simply install them without doing this, it becomes much more difficult to adjust the movement later. Of course, I check the movement again at the end, but at this stage I already adjust it so that it is close to the feel I am aiming for. The movement of a Mame puzzle box changes very little during the remaining assembly process, so the adjustment made here is already very close to the final result. Because the box is so small, the panels need to move with only a very light touch to achieve a smooth sliding action.
You can attach the panels in any order, but I usually start with the smaller side panel, then the larger side panel, followed by the bottom panel, and finally the top panel. The top panel is the one that can still be adjusted the most later, so at this stage I only check that it is not too loose. If I install the large top and bottom panels first, they get in the way when I check the movement of the side panels, so I always attach the side panels first. The bottom panel is actually better if it is slightly loose, but it should never be wobbly. Once all four panels are attached, it becomes difficult to tell which side is the top, so I make a small mark on the top side. In the end, similar Yosegi panels will be attached to both sides, so the assembly process is the same either way. However, I like to use a brighter Yosegi pattern with finer details for the top, so this mark is important.