14-Step Mechanism
The hot weather continues today, but it feels a little more comfortable under cloudy skies. Today, I mainly worked on the 4-sun puzzle boxes. This time, they have a 14-step mechanism. The long side panels that I prepared yesterday still need a little more time to stabilize, so I'll leave them for now. Today, I prepared and made the axis panels and Aruki panels. I'm making the 4-sun, 14-step puzzle boxes again for the first time since April this year.
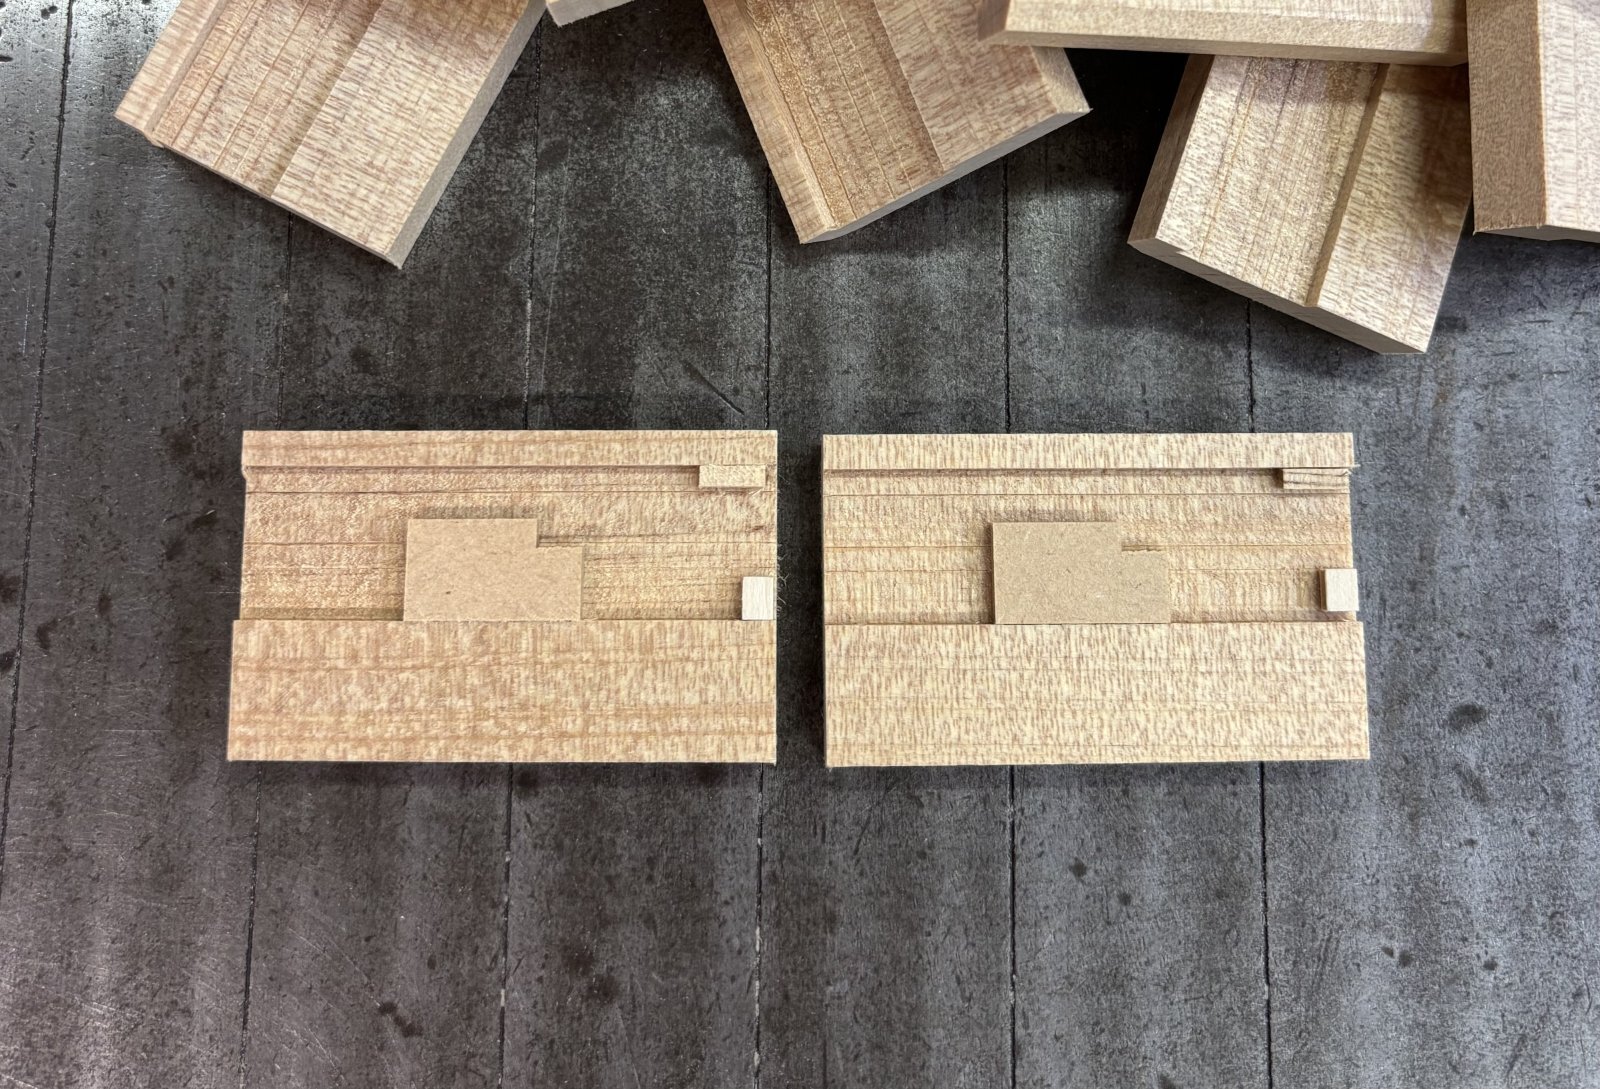
In addition to these materials, I checked my stock of parts, and it looks like I have enough for this production, so I probably will not need to make any more. The photo shows the axis panels I made and the parts that will be attached to them. Three parts are attached to each of the two axis panels, but they are attached slightly differently on each panel. This small difference is what determines whether the box has a 12-step or 14-step mechanism.Each of the two axis panels has three small parts attached. This is the setup for the 14-step mechanism. For the 12-step mechanism, the light-colored square part is removed from one of the axis panels. Whether this square part is attached or not is what changes the mechanism from 12 steps to 14 steps.
The parts on the left and right sides of the 14-step mechanism are not attached in exactly the same way. If you look closely, the light-colored square part on the right axis panel is attached slightly higher than the one on the left axis panel. This is essential for creating the 14-step mechanism. If that square part were attached in the same position as the one on the left, the box would still have only a 12-step mechanism. The part must be shifted upward by about 1.5 mm. Without this offset, on the fifth move, the top Aruki sliding panel would pass the side Aruki panel, and the mechanism would eventually finish in 12 steps. By leaving a 1.5 mm difference, the top Aruki panel catches there, requiring two more movements of the side panel. The offset must be exactly 1.5 mm. If it were 2 mm, it would interfere with the previous move.
In addition to these materials, I checked my stock of parts, and it looks like I have enough for this production, so I probably will not need to make any more. The photo shows the axis panels I made and the parts that will be attached to them. Three parts are attached to each of the two axis panels, but they are attached slightly differently on each panel. This small difference is what determines whether the box has a 12-step or 14-step mechanism.Each of the two axis panels has three small parts attached. This is the setup for the 14-step mechanism. For the 12-step mechanism, the light-colored square part is removed from one of the axis panels. Whether this square part is attached or not is what changes the mechanism from 12 steps to 14 steps.
The parts on the left and right sides of the 14-step mechanism are not attached in exactly the same way. If you look closely, the light-colored square part on the right axis panel is attached slightly higher than the one on the left axis panel. This is essential for creating the 14-step mechanism. If that square part were attached in the same position as the one on the left, the box would still have only a 12-step mechanism. The part must be shifted upward by about 1.5 mm. Without this offset, on the fifth move, the top Aruki sliding panel would pass the side Aruki panel, and the mechanism would eventually finish in 12 steps. By leaving a 1.5 mm difference, the top Aruki panel catches there, requiring two more movements of the side panel. The offset must be exactly 1.5 mm. If it were 2 mm, it would interfere with the previous move.