Top panel of 18-step box
The past few days have been unusually warm for January in Japan. According to the weather forecast, the temperatures are similar to those we usually see in March. This makes my work much easier. My workshop was built as an industrial facility, so it’s a steel-framed building. During winter, the cold air lingers inside, making the mornings extremely chilly. I use heaters, but because the ceiling is so high, they don’t work very effectively. That’s why this warm weather is such a relief!😁
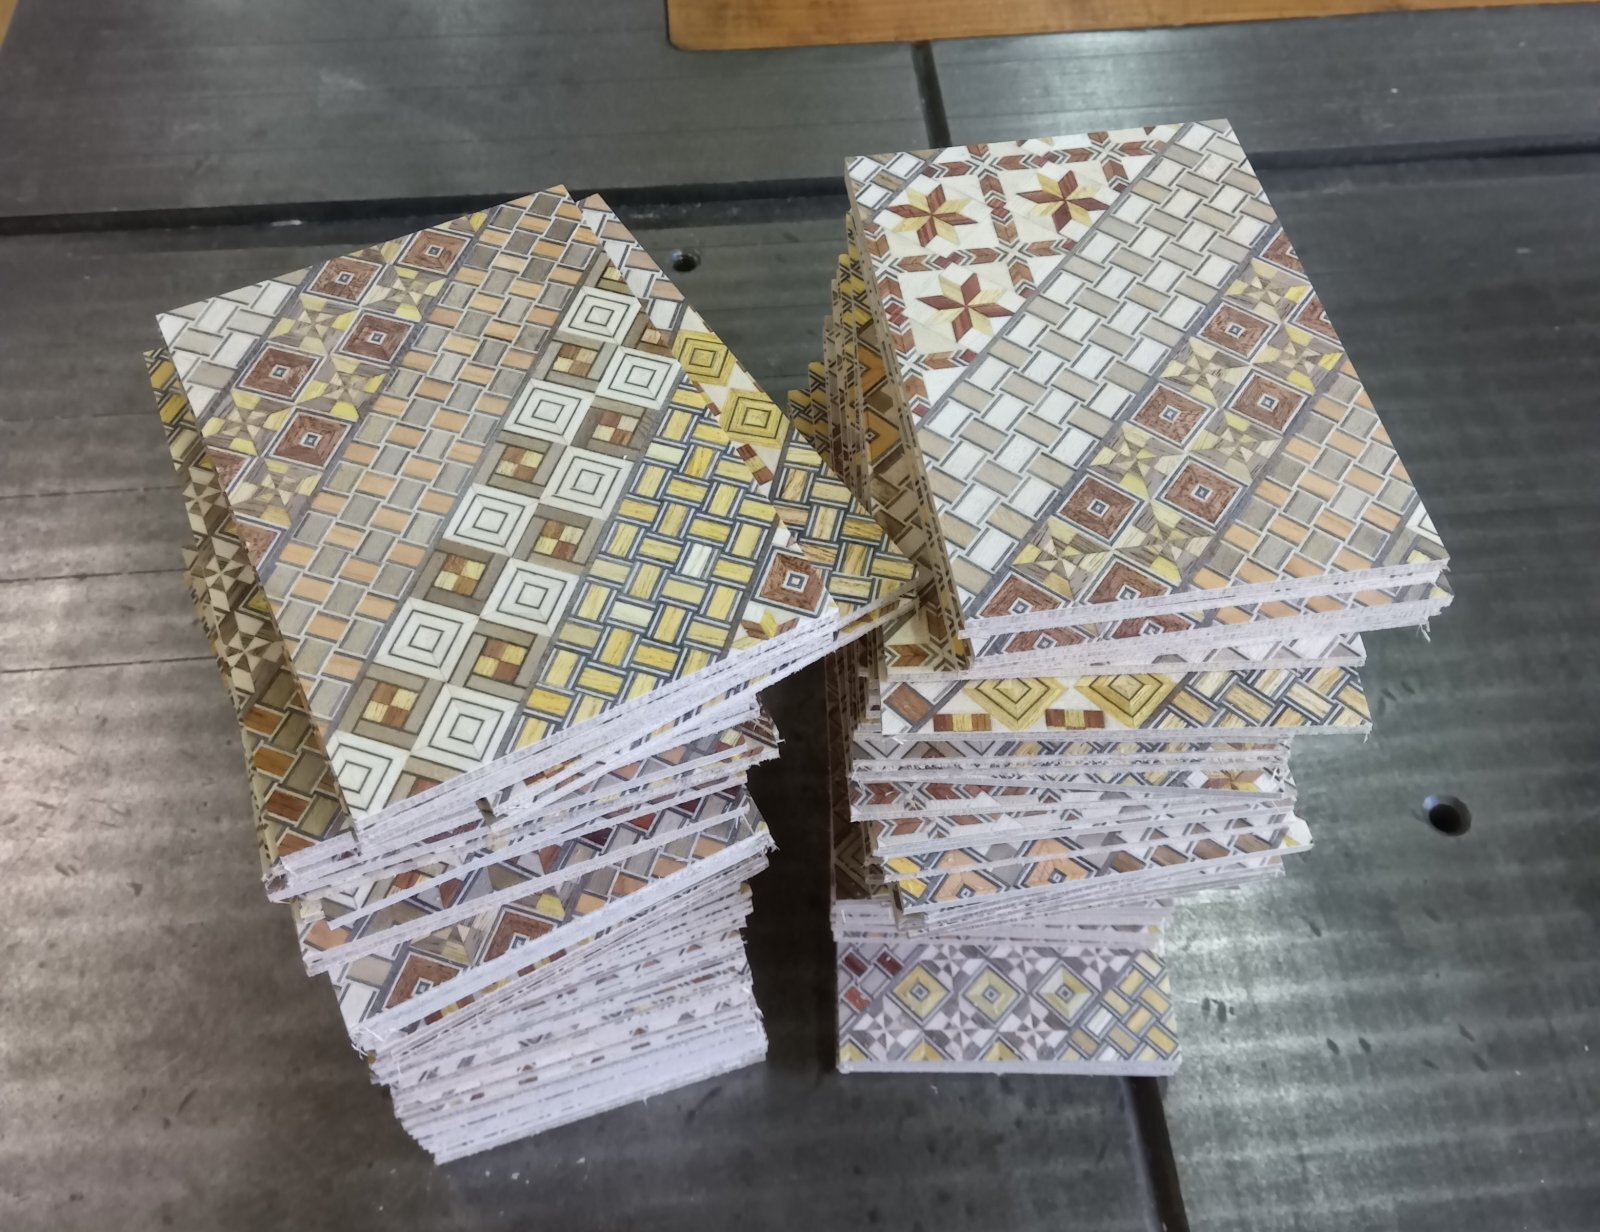
Today, I worked on making and attaching the top (bottom) panel for the 4-sun 18-step puzzle box.The two photos show the top panel and bottom panel of this box. Both are made with the same design. By the way, the limited solid wood type I mentioned yesterday has been canceled this time. I received an order to deliver some of these 4-sun 18-step puzzle boxes to a shop that needs them. As a result, the small stock I had planned to keep for myself will now all be made with traditional Yosegi or checkered Yosegi patterns. The solid wood materials I prepared yesterday will be saved for the next project.
The Yosegi board for this top panel is made by attaching a Yosegi-sheet onto plywood. I usually use plywood or MDF boards for the top and bottom panels. This is because using solid wood, like Agathis, often leads to shrinkage due to drying. Many puzzle boxes with visible gaps tend to show this issue in these areas. These panels are not fixed with glue, which makes them more vulnerable to changes in external humidity. In many cases, the humidity levels in other countries are lower than in Japan, causing the wood to shrink more easily.Plywood is less affected by these changes.
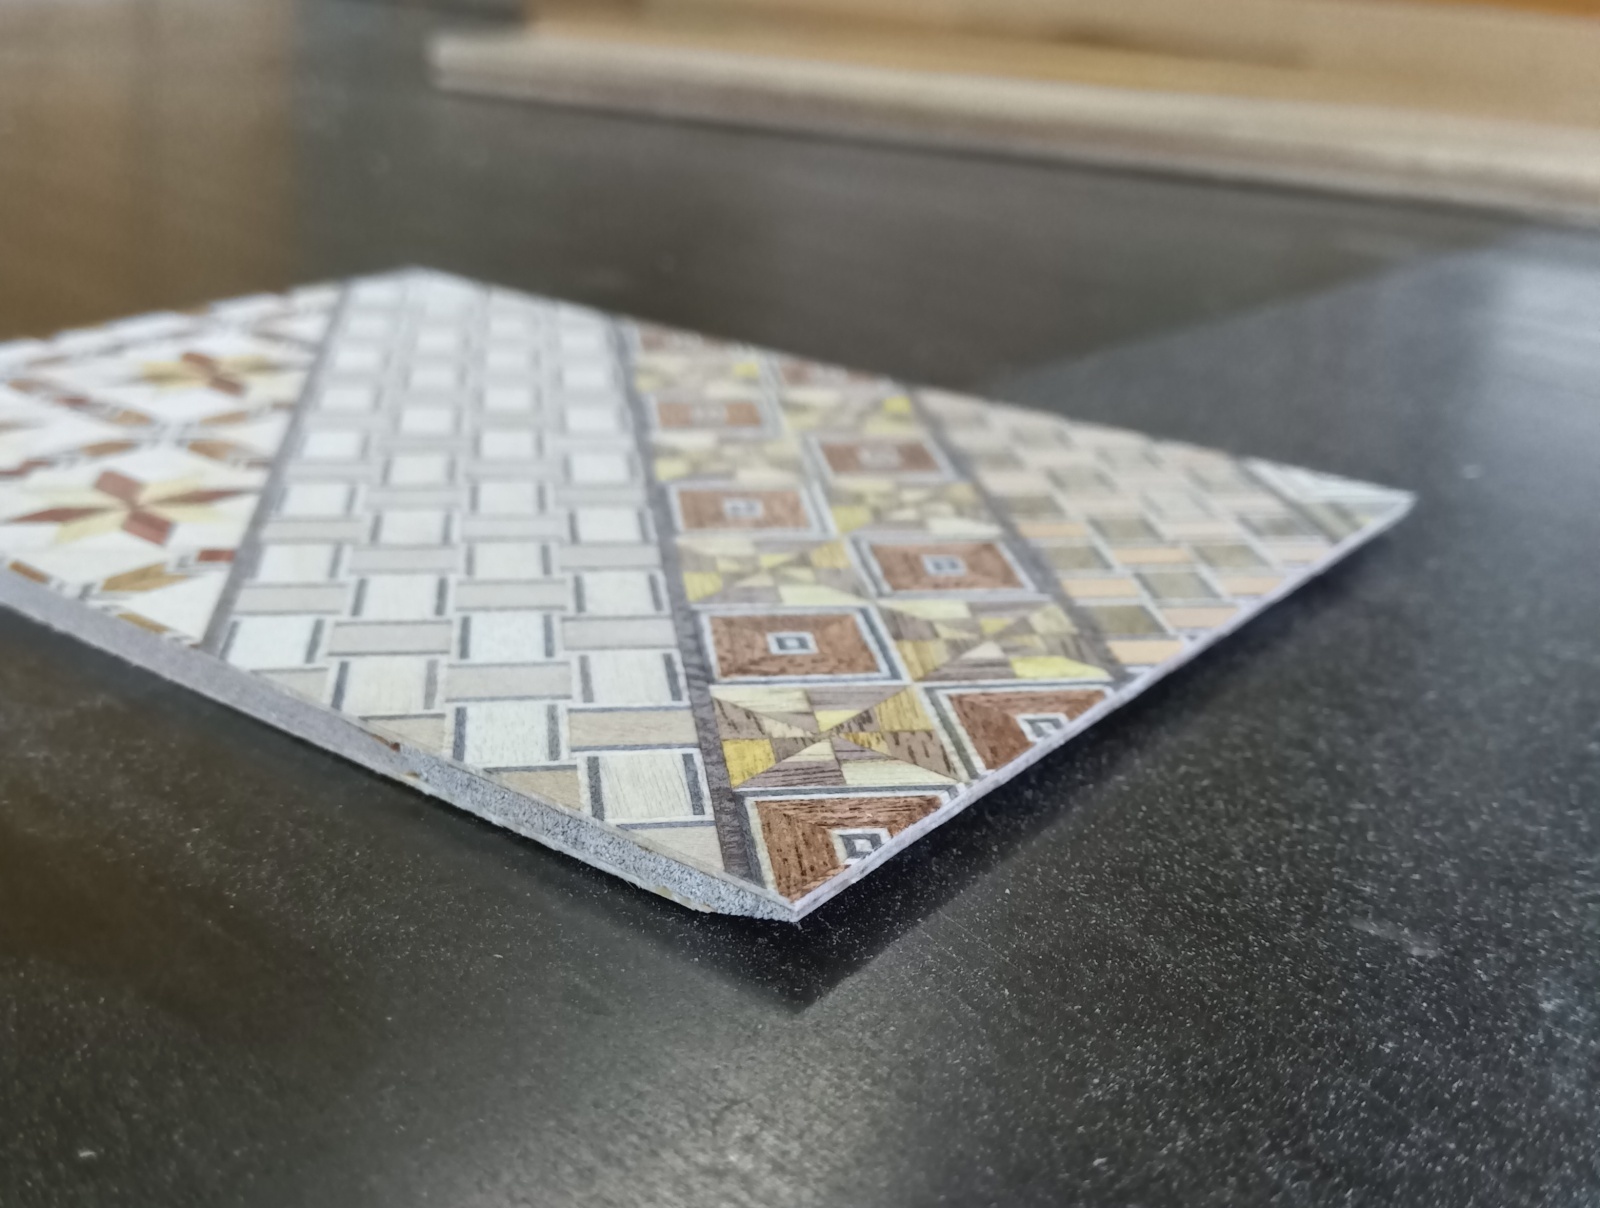
The second photo shows the front edge of this panel, which has been slightly beveled. After the first and second steps of the puzzle box move, this panel acts as the third step. At that point, the first and second steps have only moved slightly (about 2–3 mm), so there isn’t enough clearance for this panel to move freely. By shaving it down slightly, the panel becomes thinner, making it easier to slide as the third step. This type of adjustment is commonly seen in puzzle boxes where all four sides move, such as boxes with 18 steps or more. I plan to continue working on these tasks tomorrow.
Today, I worked on making and attaching the top (bottom) panel for the 4-sun 18-step puzzle box.The two photos show the top panel and bottom panel of this box. Both are made with the same design. By the way, the limited solid wood type I mentioned yesterday has been canceled this time. I received an order to deliver some of these 4-sun 18-step puzzle boxes to a shop that needs them. As a result, the small stock I had planned to keep for myself will now all be made with traditional Yosegi or checkered Yosegi patterns. The solid wood materials I prepared yesterday will be saved for the next project.
The Yosegi board for this top panel is made by attaching a Yosegi-sheet onto plywood. I usually use plywood or MDF boards for the top and bottom panels. This is because using solid wood, like Agathis, often leads to shrinkage due to drying. Many puzzle boxes with visible gaps tend to show this issue in these areas. These panels are not fixed with glue, which makes them more vulnerable to changes in external humidity. In many cases, the humidity levels in other countries are lower than in Japan, causing the wood to shrink more easily.Plywood is less affected by these changes.
The second photo shows the front edge of this panel, which has been slightly beveled. After the first and second steps of the puzzle box move, this panel acts as the third step. At that point, the first and second steps have only moved slightly (about 2–3 mm), so there isn’t enough clearance for this panel to move freely. By shaving it down slightly, the panel becomes thinner, making it easier to slide as the third step. This type of adjustment is commonly seen in puzzle boxes where all four sides move, such as boxes with 18 steps or more. I plan to continue working on these tasks tomorrow.