Attaching solid ichimatsu yosegi
This morning was a little warmer than yesterday. During the day, even inside the workshop, the sunlight felt warm and comfortable. I spent the whole day working in the workshop and moved forward with several tasks. I was also able to finish the final coating, and today the Mame (1-sun) puzzle boxes with 18 steps were completed.
I have not finished the final check yet, but I plan to do that tomorrow. When I make larger puzzle boxes, after the undercoat is finished, I gently move the mechanisms once. This is done to prevent the coating from sticking the moving parts together. However, for Mame puzzle boxes, I do not do this step. When coating sticks, it can be very strong. Sometimes it can even cause the wood to crack. In this case, the crack does not happen in the moving parts, but in a different part of the wood. Even so, the parts that should move can still become stuck and not come off. It is almost like a very strong glue. Because of this, when both an undercoat and a top coat are applied, the sticking becomes even stronger. That is why, with larger puzzle boxes, I remove this sticking once at the undercoat stage. For Mame puzzle boxes, I have adjusted the coating so this step is not needed. They are coated with a special mixture that is less likely to stick.
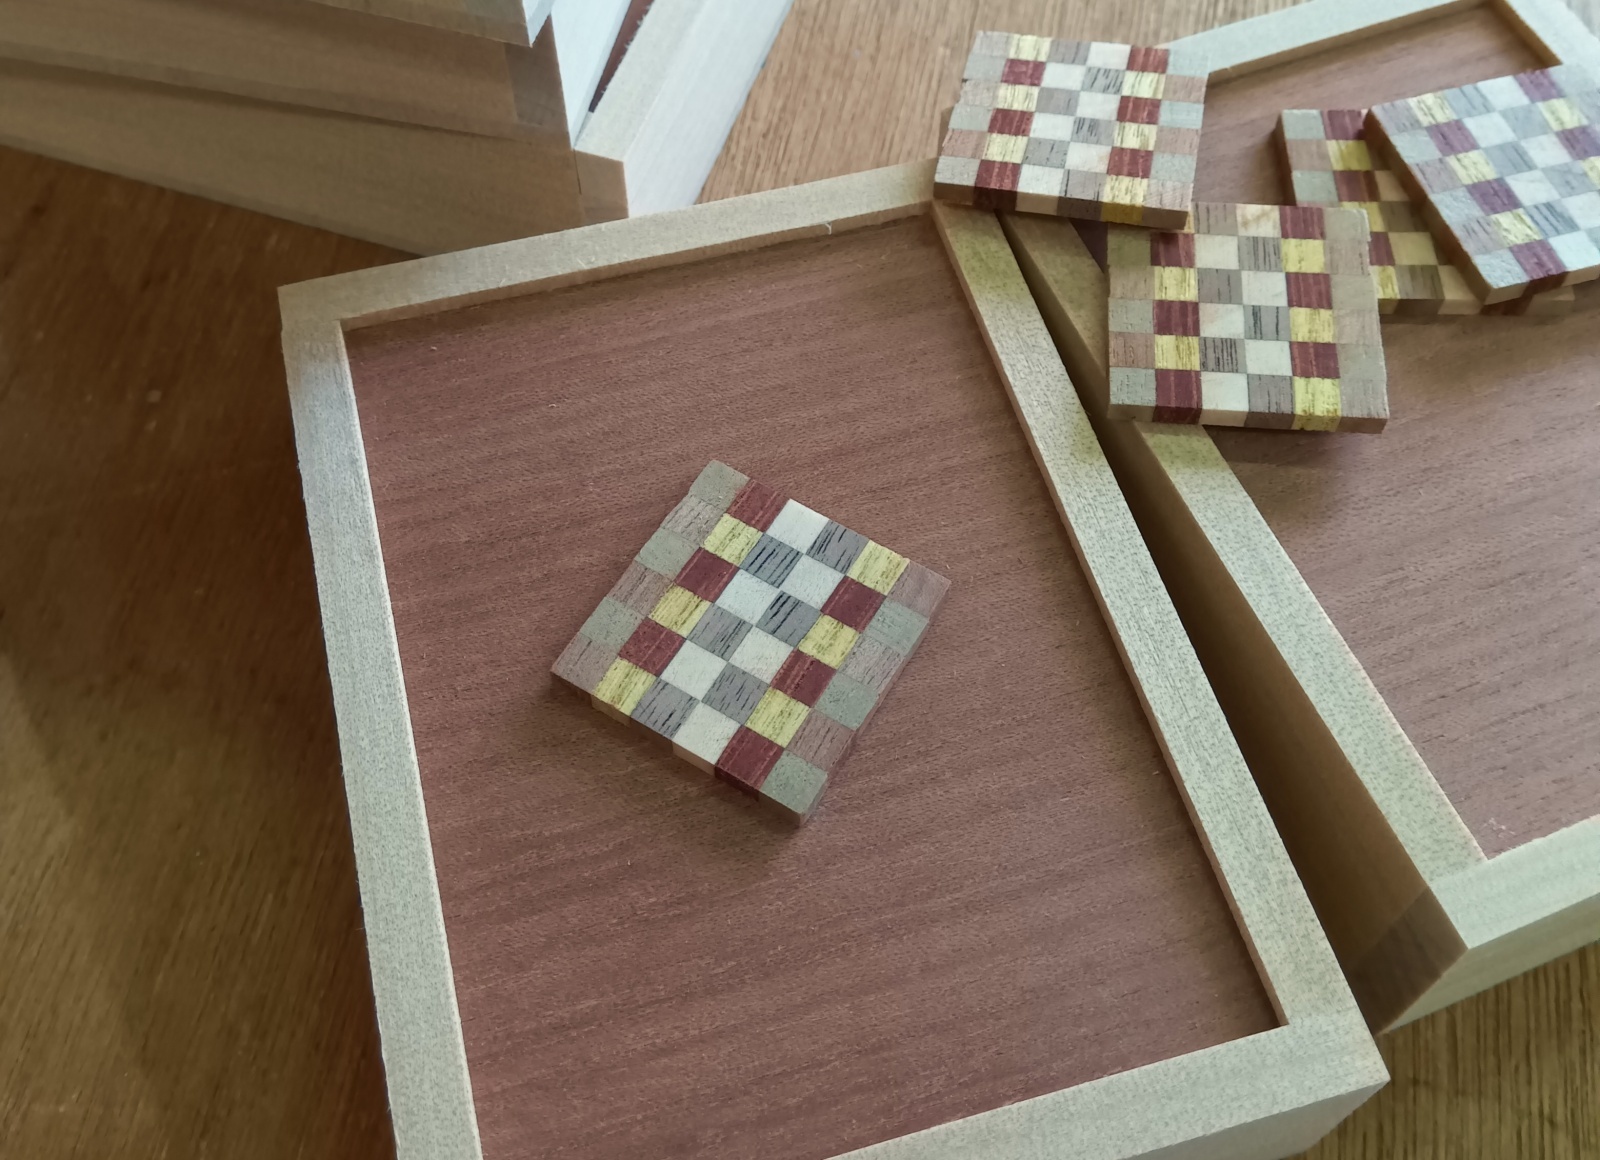
Today, in addition to that work, I finished the inner box of the 5-sun puzzle box with a drawer shown in the photo. By “finish,” I mean that the assembly is now complete. The solid ichimatsu yosegi seen in the photo was made earlier, and it will be attached at the very end, after all the boxes are fully finished. The yosegi is glued in place by applying glue to the back side, but if the glue comes out too much, it can stick to the Makore wood on the lid. When the box is coated, that glue will appear as a white mark on the surface. To avoid this, I apply the glue a little more toward the inside and attach it carefully so it does not come out. When attaching thin solid yosegi like this, applying glue to the back often causes the wood to warp toward the opposite side. This time, I thought it might be okay, but perhaps because the air is dry, it started to warp quickly. I panicked a little and added water to the front surface. When a wooden board absorbs moisture, the side with moisture swells and bends, so to prevent warping, it helps to slightly wet the opposite side as well, to keep the balance. Because glue contains moisture, this kind of warping happens quite often.After reaching this stage, the inner box was able to move on to the undercoat process safely today.
I have not finished the final check yet, but I plan to do that tomorrow. When I make larger puzzle boxes, after the undercoat is finished, I gently move the mechanisms once. This is done to prevent the coating from sticking the moving parts together. However, for Mame puzzle boxes, I do not do this step. When coating sticks, it can be very strong. Sometimes it can even cause the wood to crack. In this case, the crack does not happen in the moving parts, but in a different part of the wood. Even so, the parts that should move can still become stuck and not come off. It is almost like a very strong glue. Because of this, when both an undercoat and a top coat are applied, the sticking becomes even stronger. That is why, with larger puzzle boxes, I remove this sticking once at the undercoat stage. For Mame puzzle boxes, I have adjusted the coating so this step is not needed. They are coated with a special mixture that is less likely to stick.
Today, in addition to that work, I finished the inner box of the 5-sun puzzle box with a drawer shown in the photo. By “finish,” I mean that the assembly is now complete. The solid ichimatsu yosegi seen in the photo was made earlier, and it will be attached at the very end, after all the boxes are fully finished. The yosegi is glued in place by applying glue to the back side, but if the glue comes out too much, it can stick to the Makore wood on the lid. When the box is coated, that glue will appear as a white mark on the surface. To avoid this, I apply the glue a little more toward the inside and attach it carefully so it does not come out. When attaching thin solid yosegi like this, applying glue to the back often causes the wood to warp toward the opposite side. This time, I thought it might be okay, but perhaps because the air is dry, it started to warp quickly. I panicked a little and added water to the front surface. When a wooden board absorbs moisture, the side with moisture swells and bends, so to prevent warping, it helps to slightly wet the opposite side as well, to keep the balance. Because glue contains moisture, this kind of warping happens quite often.After reaching this stage, the inner box was able to move on to the undercoat process safely today.