Preparation of Ichimatsu panels
Today was different from yesterday — it was cloudy from the morning, and by afternoon it started to rain. When there’s no sunshine, it feels a bit chilly. The weather has suddenly shifted to winter mode, and the news is advising everyone to take care of their health. It seems this weekend’s weather won’t be very good either.
This afternoon, I decided to attach the Aruki moving panels for the 5-sun box, as I had planned to do so today. Since the humidity wasn’t too high when the rain first started, I thought it would be possible to continue the work. I’m glad I was able to finish it before it became too humid — tomorrow, I wouldn’t be able to take the box out of the storage case anymore.
I haven’t pasted the walnut sheets for the top and bottom panels yet, so for now, I’ll keep the box stored in the case. The production of the 5-sun drawer box will be paused for few days.
And the drawer box has one more step — making the drawer itself. The parts for it were already finished and waiting for assembly. Now that the main body of the box is complete, I started putting the drawer together today.
First, I assembled the frame by gluing together the four parts — the two long sides and the two short sides — into a rectangular shape. Then I fixed it with rubber bands and let it sit for a while until it bonded. Once it was attached, I glued on the plywood bottom panel and again secured it with rubber bands for a short time. That’s as far as I got today.
The next steps will be sanding the outer edges of the frame to smooth it, then attaching the small part that will serve as the drawer handle. After that, I’ll make and attach the top lid panel. Finally, I’ll round off the corners to complete it.
For the finishing touch, I’ll lightly coat the top surface of the walnut lid and the drawer front with a small amount of finish coating— just enough to protect the surface and enhance the natural color of the panels and yosegi. This simple finish helps prevent stains and gives the wood a warm, beautiful look.
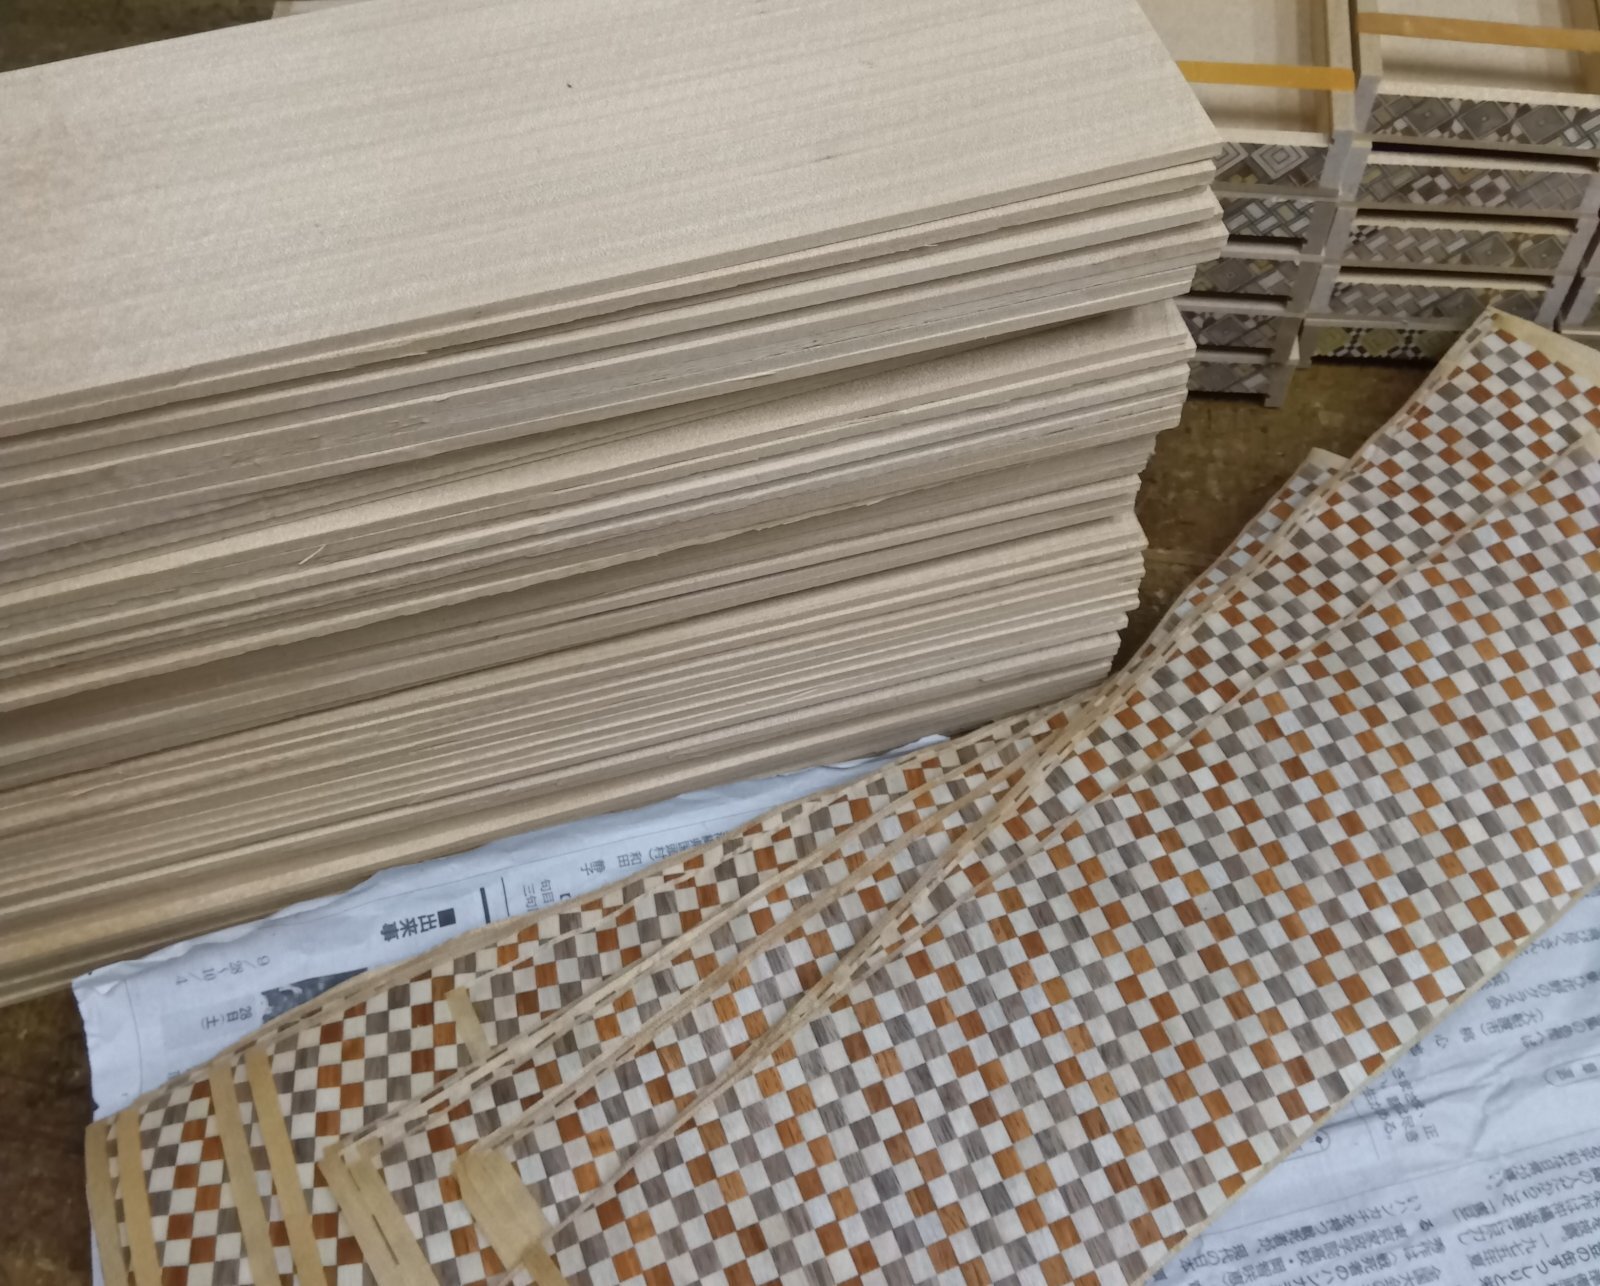
Since I couldn’t continue working on the 5-sun drawer box today, I started preparing for the next project — the 3-sun cube boxes. This time, I’ll be making two versions at the request of an overseas shop: a 14-step cube and an 18-step cube, both with the same checkered yosegi design. Because the mechanisms are different, I’ll build them separately, but I can prepare the yosegi panels for both at the same time since they share the same design.
Today, I first prepared the base boards for the panels in the required number. Actually, this will be the last batch using the three-colored checkered yosegi sheets I made earlier this year. Once they’re used up, the next production will be sometime next year. These will likely be the final 3-sun cubes of this year.
This time, I’m planning to try not only the checkered yosegi design but also some new styles. I hope these will lead to new ideas and designs that I can continue developing next year 😊
Have a great weekend!
This afternoon, I decided to attach the Aruki moving panels for the 5-sun box, as I had planned to do so today. Since the humidity wasn’t too high when the rain first started, I thought it would be possible to continue the work. I’m glad I was able to finish it before it became too humid — tomorrow, I wouldn’t be able to take the box out of the storage case anymore.
I haven’t pasted the walnut sheets for the top and bottom panels yet, so for now, I’ll keep the box stored in the case. The production of the 5-sun drawer box will be paused for few days.
And the drawer box has one more step — making the drawer itself. The parts for it were already finished and waiting for assembly. Now that the main body of the box is complete, I started putting the drawer together today.
First, I assembled the frame by gluing together the four parts — the two long sides and the two short sides — into a rectangular shape. Then I fixed it with rubber bands and let it sit for a while until it bonded. Once it was attached, I glued on the plywood bottom panel and again secured it with rubber bands for a short time. That’s as far as I got today.
The next steps will be sanding the outer edges of the frame to smooth it, then attaching the small part that will serve as the drawer handle. After that, I’ll make and attach the top lid panel. Finally, I’ll round off the corners to complete it.
For the finishing touch, I’ll lightly coat the top surface of the walnut lid and the drawer front with a small amount of finish coating— just enough to protect the surface and enhance the natural color of the panels and yosegi. This simple finish helps prevent stains and gives the wood a warm, beautiful look.
Since I couldn’t continue working on the 5-sun drawer box today, I started preparing for the next project — the 3-sun cube boxes. This time, I’ll be making two versions at the request of an overseas shop: a 14-step cube and an 18-step cube, both with the same checkered yosegi design. Because the mechanisms are different, I’ll build them separately, but I can prepare the yosegi panels for both at the same time since they share the same design.
Today, I first prepared the base boards for the panels in the required number. Actually, this will be the last batch using the three-colored checkered yosegi sheets I made earlier this year. Once they’re used up, the next production will be sometime next year. These will likely be the final 3-sun cubes of this year.
This time, I’m planning to try not only the checkered yosegi design but also some new styles. I hope these will lead to new ideas and designs that I can continue developing next year 😊
Have a great weekend!