Assembling the Drawers
Today was the last day of the long weekend. The weather was beautiful again, and it was almost hot during the day. As I mentioned yesterday, I was out during the day, so I stopped by the workshop for just a little while in the afternoon. I am currently making the 5-sun puzzle boxes, and today I finished assembling the frame panels. I also attached the parts, and tomorrow I plan to start making the Aruki sliding panels. These boxes have drawers, so I may spend more time sitting at my workbench assembling them than I do with regular puzzle boxes. I made the drawer parts the other day, but I had not assembled them yet, so I also did that today.
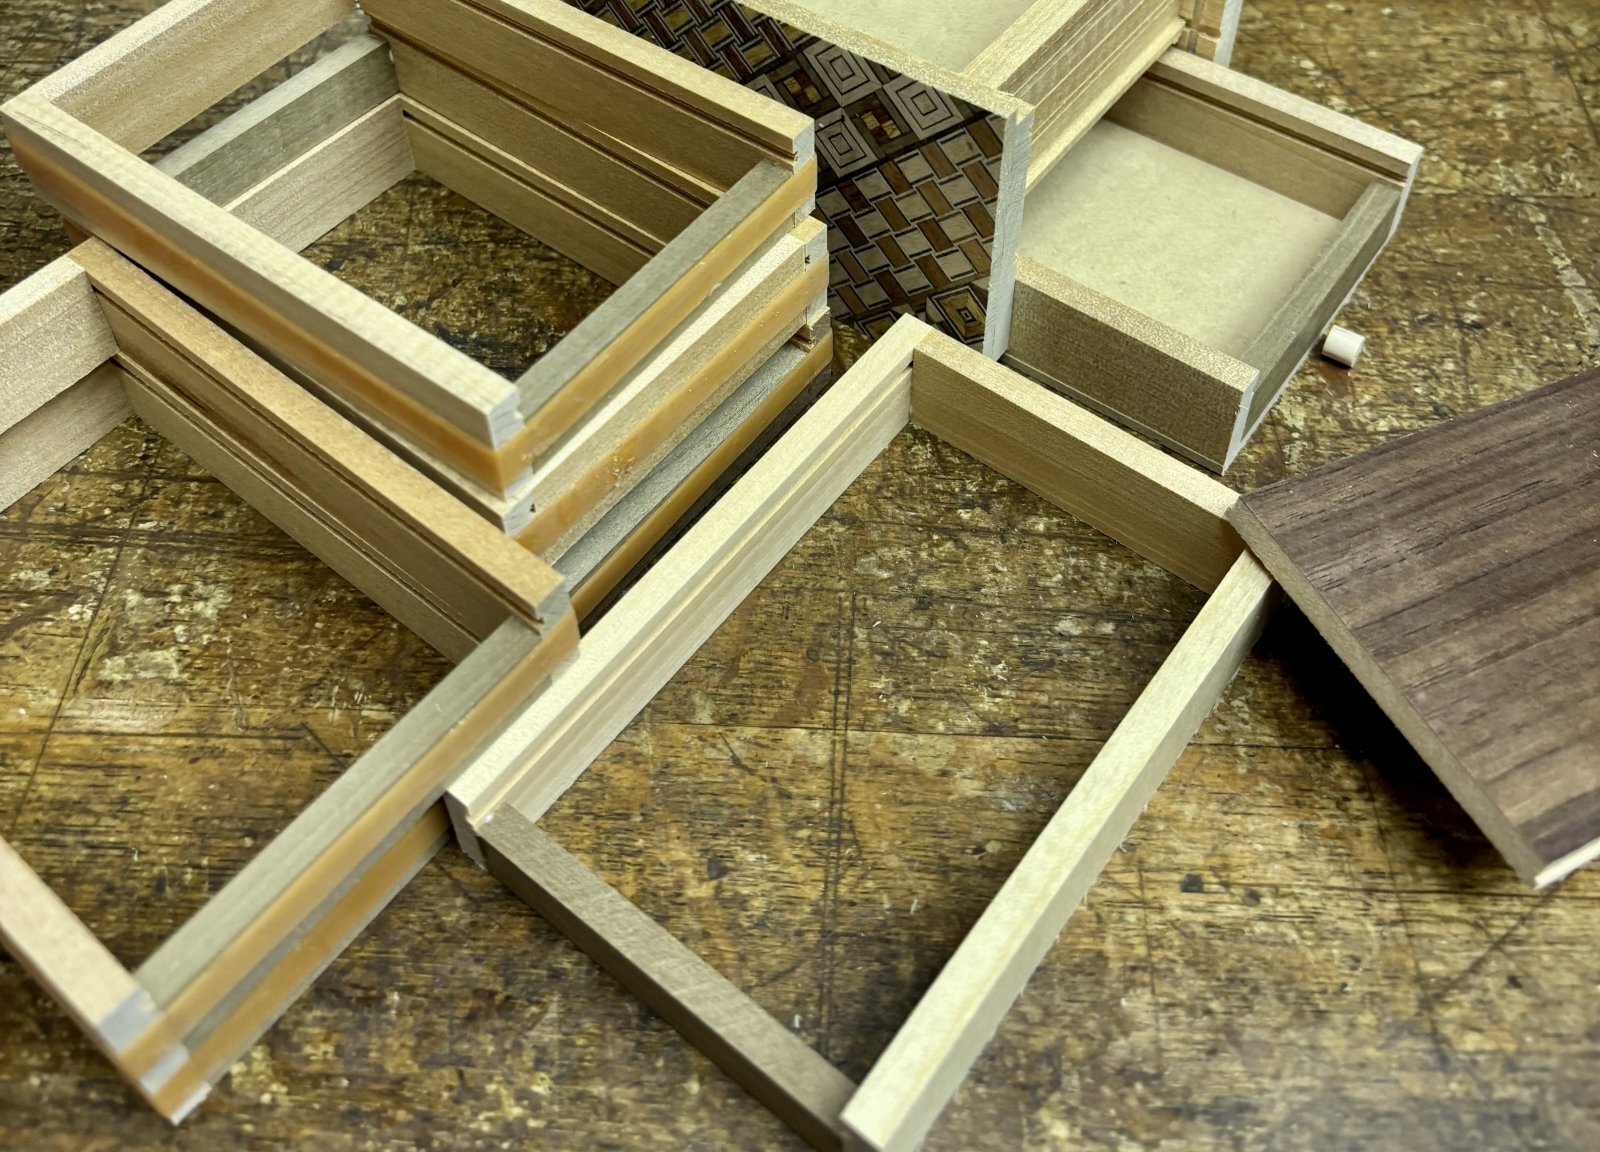
The photo shows the drawers being assembled. You can also see the box frames behind them. Each drawer fits into this space in the frame. By the way, you can also see some lid parts in the photo. These are left over from an earlier batch, and I used them as a guide to make the parts for this batch of drawers. The drawer has a lid, and pulling out the drawer and opening its lid are the 9th and 10th steps. In the past, I sometimes made puzzle boxes with drawers in the 4-sun size, which is one size smaller than this box. I also attached lids to those drawers to make them 10-steps puzzle boxes. At the time, quite a long time ago, I did not know whether 4-sun puzzle boxes with drawers had been made before. I added a drawer with a lid to this smaller box too, so the space inside the already small drawer became even smaller! 😅 In fact, traditional 4-sun puzzle boxes with drawers usually have no lid on the drawer. In a 4-steps puzzle box, for example, the drawer usually comes out on the fourth step. The drawer is simply an open tray with no lid.
To assemble the drawer, I first join the four frame parts, then glue on the bottom panel. Before assembly, I cut grooves in the two long frame parts for the lid panel to slide through. These grooves cannot be cut after assembly, so forgetting them would be a real problem! Next, I sand around the frame to make the surfaces even. Since I assemble the parts by hand, as shown in the photo, small steps between the parts are hard to avoid, even when I try to line them up perfectly. I sand these areas until they are flat. Doing this with hand tools would take a lot of time and effort, and making a clean, even surface would also require a lot of skill. So I use a sanding machine. This removes the small steps and makes the frame surfaces smoother. The edges of the bottom panel are sanded at the same time. With this in mind, I glue the bottom panel on so that it extends about 0.5 mm beyond the frame. I then sand away the extra edges to make a smooth, flat surface. The drawer frame is now finished. From this point on, I take care to keep it clean while I attach a small round wooden dowel to the front as a handle. This dowel fits into the notch at the bottom of the Aruki panel, so it must be shorter than the thickness of that panel. The Aruki panel on this box is 6.5 mm thick, so I make the dowel 6 mm long.
The photo shows the drawers being assembled. You can also see the box frames behind them. Each drawer fits into this space in the frame. By the way, you can also see some lid parts in the photo. These are left over from an earlier batch, and I used them as a guide to make the parts for this batch of drawers. The drawer has a lid, and pulling out the drawer and opening its lid are the 9th and 10th steps. In the past, I sometimes made puzzle boxes with drawers in the 4-sun size, which is one size smaller than this box. I also attached lids to those drawers to make them 10-steps puzzle boxes. At the time, quite a long time ago, I did not know whether 4-sun puzzle boxes with drawers had been made before. I added a drawer with a lid to this smaller box too, so the space inside the already small drawer became even smaller! 😅 In fact, traditional 4-sun puzzle boxes with drawers usually have no lid on the drawer. In a 4-steps puzzle box, for example, the drawer usually comes out on the fourth step. The drawer is simply an open tray with no lid.
To assemble the drawer, I first join the four frame parts, then glue on the bottom panel. Before assembly, I cut grooves in the two long frame parts for the lid panel to slide through. These grooves cannot be cut after assembly, so forgetting them would be a real problem! Next, I sand around the frame to make the surfaces even. Since I assemble the parts by hand, as shown in the photo, small steps between the parts are hard to avoid, even when I try to line them up perfectly. I sand these areas until they are flat. Doing this with hand tools would take a lot of time and effort, and making a clean, even surface would also require a lot of skill. So I use a sanding machine. This removes the small steps and makes the frame surfaces smoother. The edges of the bottom panel are sanded at the same time. With this in mind, I glue the bottom panel on so that it extends about 0.5 mm beyond the frame. I then sand away the extra edges to make a smooth, flat surface. The drawer frame is now finished. From this point on, I take care to keep it clean while I attach a small round wooden dowel to the front as a handle. This dowel fits into the notch at the bottom of the Aruki panel, so it must be shorter than the thickness of that panel. The Aruki panel on this box is 6.5 mm thick, so I make the dowel 6 mm long.