Dividing the Sliding Key Again
Today, we had sunshine for the first time in a while. It was still cloudy and humid in the morning, but by noon the sky had completely cleared, and the humidity gradually began to drop. I wanted to take advantage of these conditions and attach some panels, but the timing did not match the stage of my work, so I could not do it today. A typhoon is expected to approach this weekend, so if possible, I hope to attach the sliding key panels to one side of both the Square and 5-sun puzzle boxes tomorrow.
As the step before attaching the sliding key panels, I first made and attached the top and bottom panels for the Square puzzle boxes today. As I mentioned a few days ago, some of the boxes use leftover natural wood panels from earlier projects. The others use the new random wood grain panels made for this batch. These new random wood grain panels are used only for the top lid. The fixed bottom panels are covered with Walnut. This time, I combined three different kinds of wood, but matching their heights was a little difficult. Unlike the usual process of joining boards side by side, some of these pieces are joined at the end grain, which makes it harder to fit them together perfectly. If the edges are not completely straight, a small gap can form and create a hollow area. Once this happens, it is difficult to fill, and the result can look unnatural. After the finish is applied, it may appear as a sunken line, so I hope everything turns out well this time.
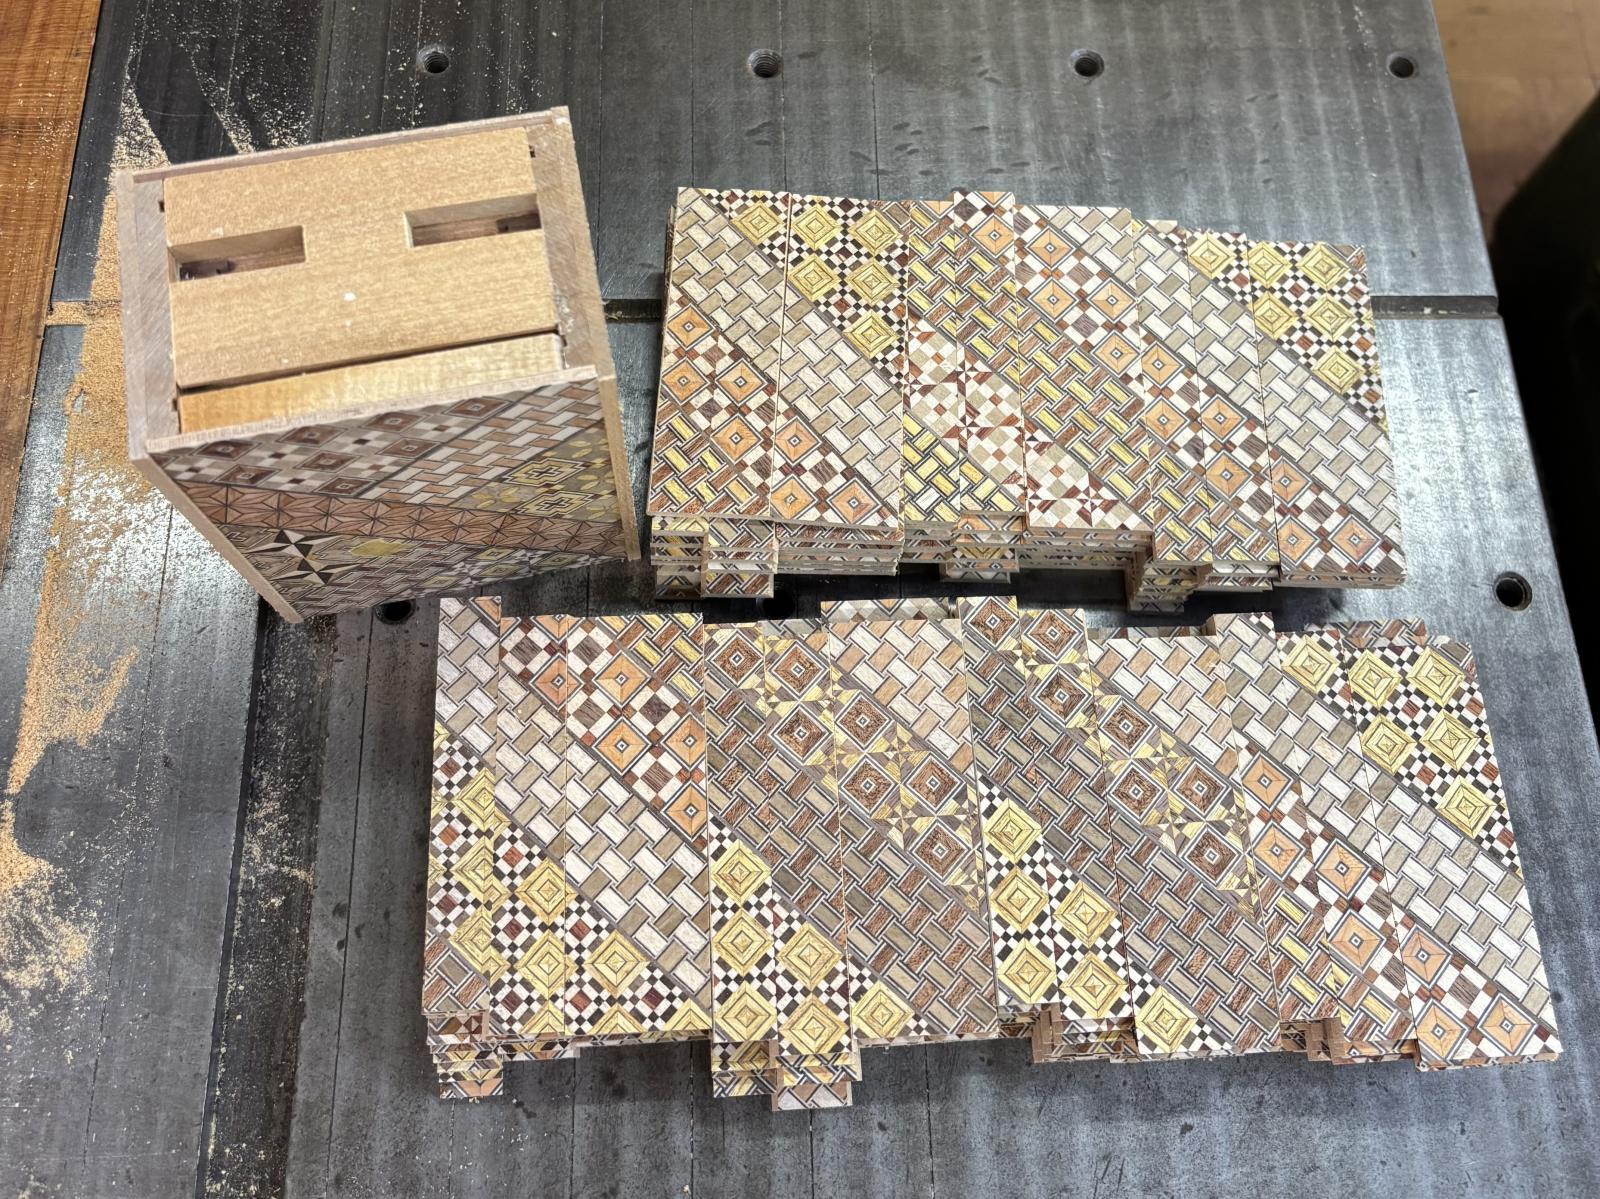
After that, I made the sliding keys for the 5-sun 36-step puzzle boxes in preparation for attaching the panels tomorrow. Because this box has a high number of steps, each sliding key panel is divided into four parts. Normally, it is divided into three. First, I cut one panel into three parts as usual. Then, the moving center part—the sliding key—is divided into two. The photo shows the panel before the center part is divided. At this stage, it has been cut into the usual three parts. When dividing the center part, it is important to make the left and right sliding keys exactly the same length. They move symmetrically, so their movement will not look beautiful if they are different. I also adjust their length in advance so that each sliding key reaches exactly from the outside edge of the box to the center. In other words, after cutting the middle with a saw, the two sliding keys become shorter by the width of the saw cut. When the two pieces are placed side by side, their total length must match the width of the box. This allows me to attach the left and right sliding keys in exactly the same positions. This is one of the special points that requires extra care when making the 36-step puzzle box.
As the step before attaching the sliding key panels, I first made and attached the top and bottom panels for the Square puzzle boxes today. As I mentioned a few days ago, some of the boxes use leftover natural wood panels from earlier projects. The others use the new random wood grain panels made for this batch. These new random wood grain panels are used only for the top lid. The fixed bottom panels are covered with Walnut. This time, I combined three different kinds of wood, but matching their heights was a little difficult. Unlike the usual process of joining boards side by side, some of these pieces are joined at the end grain, which makes it harder to fit them together perfectly. If the edges are not completely straight, a small gap can form and create a hollow area. Once this happens, it is difficult to fill, and the result can look unnatural. After the finish is applied, it may appear as a sunken line, so I hope everything turns out well this time.
After that, I made the sliding keys for the 5-sun 36-step puzzle boxes in preparation for attaching the panels tomorrow. Because this box has a high number of steps, each sliding key panel is divided into four parts. Normally, it is divided into three. First, I cut one panel into three parts as usual. Then, the moving center part—the sliding key—is divided into two. The photo shows the panel before the center part is divided. At this stage, it has been cut into the usual three parts. When dividing the center part, it is important to make the left and right sliding keys exactly the same length. They move symmetrically, so their movement will not look beautiful if they are different. I also adjust their length in advance so that each sliding key reaches exactly from the outside edge of the box to the center. In other words, after cutting the middle with a saw, the two sliding keys become shorter by the width of the saw cut. When the two pieces are placed side by side, their total length must match the width of the box. This allows me to attach the left and right sliding keys in exactly the same positions. This is one of the special points that requires extra care when making the 36-step puzzle box.