Sliding Keys and Their Design
It was another humid morning today, but we had some sunshine during the morning, so I continued attaching the panels to the 3-sun boxes. I haven’t assembled the frames for the 5-sun boxes that I made yesterday yet. Once they are assembled, they take up a little more space, so I’m planning to attach the panels to these 3-sun boxes first, put them away in their cases, and then assemble the 5-sun boxes. The long side panels for the 5-sun boxes are quite long, so even before assembly, I always put some weight on top of the stacked panels to keep them from warping. This time, the vise is free, so I’m keeping them under pressure in the vise.
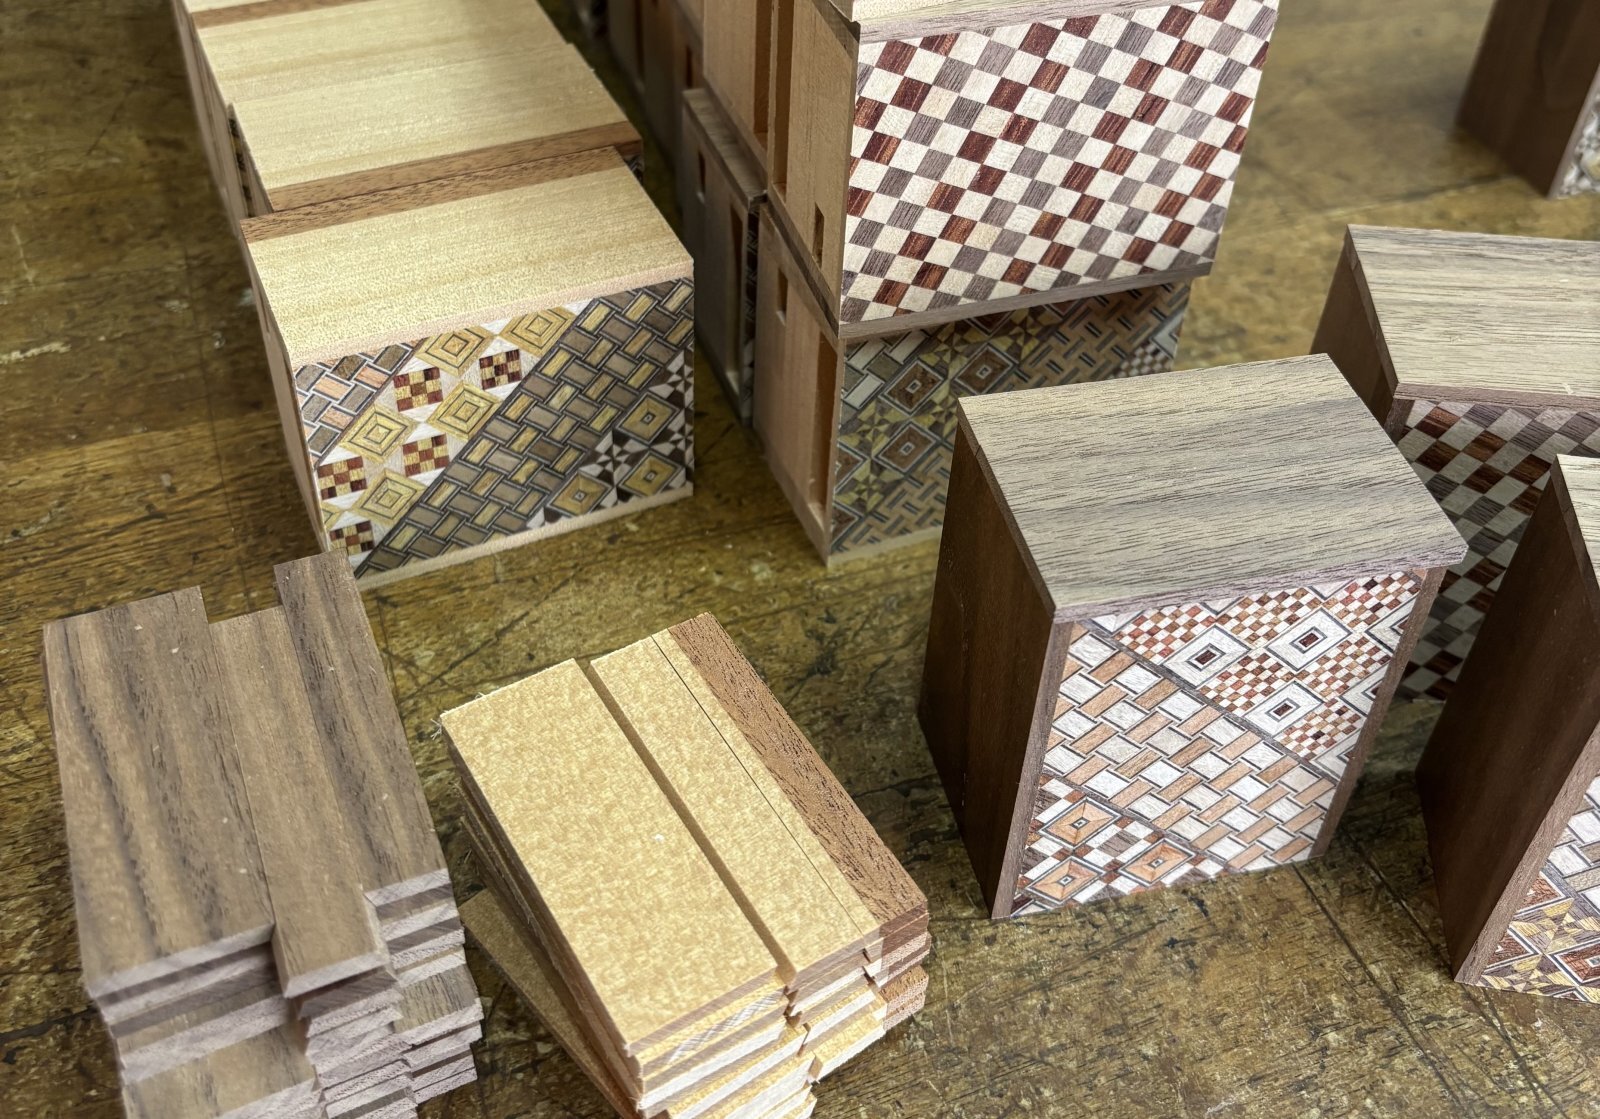
Everything was ready, so I attached the panels to the 3-sun boxes at the end of the morning. You can see them in the photo. This time, there are several different designs for the top and bottom panels, but there are two types of side panels. Most of them are Walnut, but as you can see in the photo, I also made some panels using two different woods. I call this the “natural wood type.” With the way I make my Japanese puzzle boxes now, this two-color design has become a little more difficult to make. Unlike my old method, it takes some extra work to line up the upper wood line of the two-color design. I need to match the position of the upper line on the sliding key panel with the line on the long side panel. During the making process, the width of this upper line always becomes a little narrower than it was on the panel I prepared at first. So I also need to make the line on the sliding key panel narrower to match it. I have used this type of design with a narrow line at the top many times before on 4-sun, square, and other boxes. One important point is not to make this line wider than the top part of the three parts that make up the sliding key panel. This keeps the process from becoming more difficult than necessary. If I make the line wider than that, when I cut the sliding key, the saw cut makes the line even narrower. Then it no longer lines up with the long side panel, and things get complicated again!..haha. I planned the dimensions that way this time as well, and I think you can see it in the photo.
In the afternoon, I took the long side panels out of the vise and assembled the frames for the 5-sun boxes. I’m making about 30 boxes this time. I have started attaching the parts, and it looks like I have enough of the parts that I was worried might run out. However, I will probably need to make more of these parts before the next batch. While working on these boxes, I was also thinking about how I could make a box with even more steps. With these same parts and Aruki sliding panels, 36 steps seems to be the limit for now. If I want to use exactly the same parts, one option would be to change the direction of the Aruki panels, which would add four more steps and make it a 40-step box. The other option would be to increase the number of sliding keys. I’d like to think about these ideas more in the future.
Everything was ready, so I attached the panels to the 3-sun boxes at the end of the morning. You can see them in the photo. This time, there are several different designs for the top and bottom panels, but there are two types of side panels. Most of them are Walnut, but as you can see in the photo, I also made some panels using two different woods. I call this the “natural wood type.” With the way I make my Japanese puzzle boxes now, this two-color design has become a little more difficult to make. Unlike my old method, it takes some extra work to line up the upper wood line of the two-color design. I need to match the position of the upper line on the sliding key panel with the line on the long side panel. During the making process, the width of this upper line always becomes a little narrower than it was on the panel I prepared at first. So I also need to make the line on the sliding key panel narrower to match it. I have used this type of design with a narrow line at the top many times before on 4-sun, square, and other boxes. One important point is not to make this line wider than the top part of the three parts that make up the sliding key panel. This keeps the process from becoming more difficult than necessary. If I make the line wider than that, when I cut the sliding key, the saw cut makes the line even narrower. Then it no longer lines up with the long side panel, and things get complicated again!..haha. I planned the dimensions that way this time as well, and I think you can see it in the photo.
In the afternoon, I took the long side panels out of the vise and assembled the frames for the 5-sun boxes. I’m making about 30 boxes this time. I have started attaching the parts, and it looks like I have enough of the parts that I was worried might run out. However, I will probably need to make more of these parts before the next batch. While working on these boxes, I was also thinking about how I could make a box with even more steps. With these same parts and Aruki sliding panels, 36 steps seems to be the limit for now. If I want to use exactly the same parts, one option would be to change the direction of the Aruki panels, which would add four more steps and make it a 40-step box. The other option would be to increase the number of sliding keys. I’d like to think about these ideas more in the future.