Combining different types of wood
It was sunny from the morning today, and it felt like a warm spring day. However, the occasional strong wind reminds me that it is still this season. Today, I worked on the final finishing of the Mame puzzle boxes, and I was able to complete it successfully. Before that, in the morning, I started by making the checkerboard yosegi for the side panels that I will use in the next process. Maybe it was lucky, but the last time I made this yosegi, it had been a while, and I miscalculated the number of wood pieces I needed and prepared double the amount. Because of that, I still had one extra set of these small checkerboard yosegi parts left, so today I was able to start from the gluing process right away.
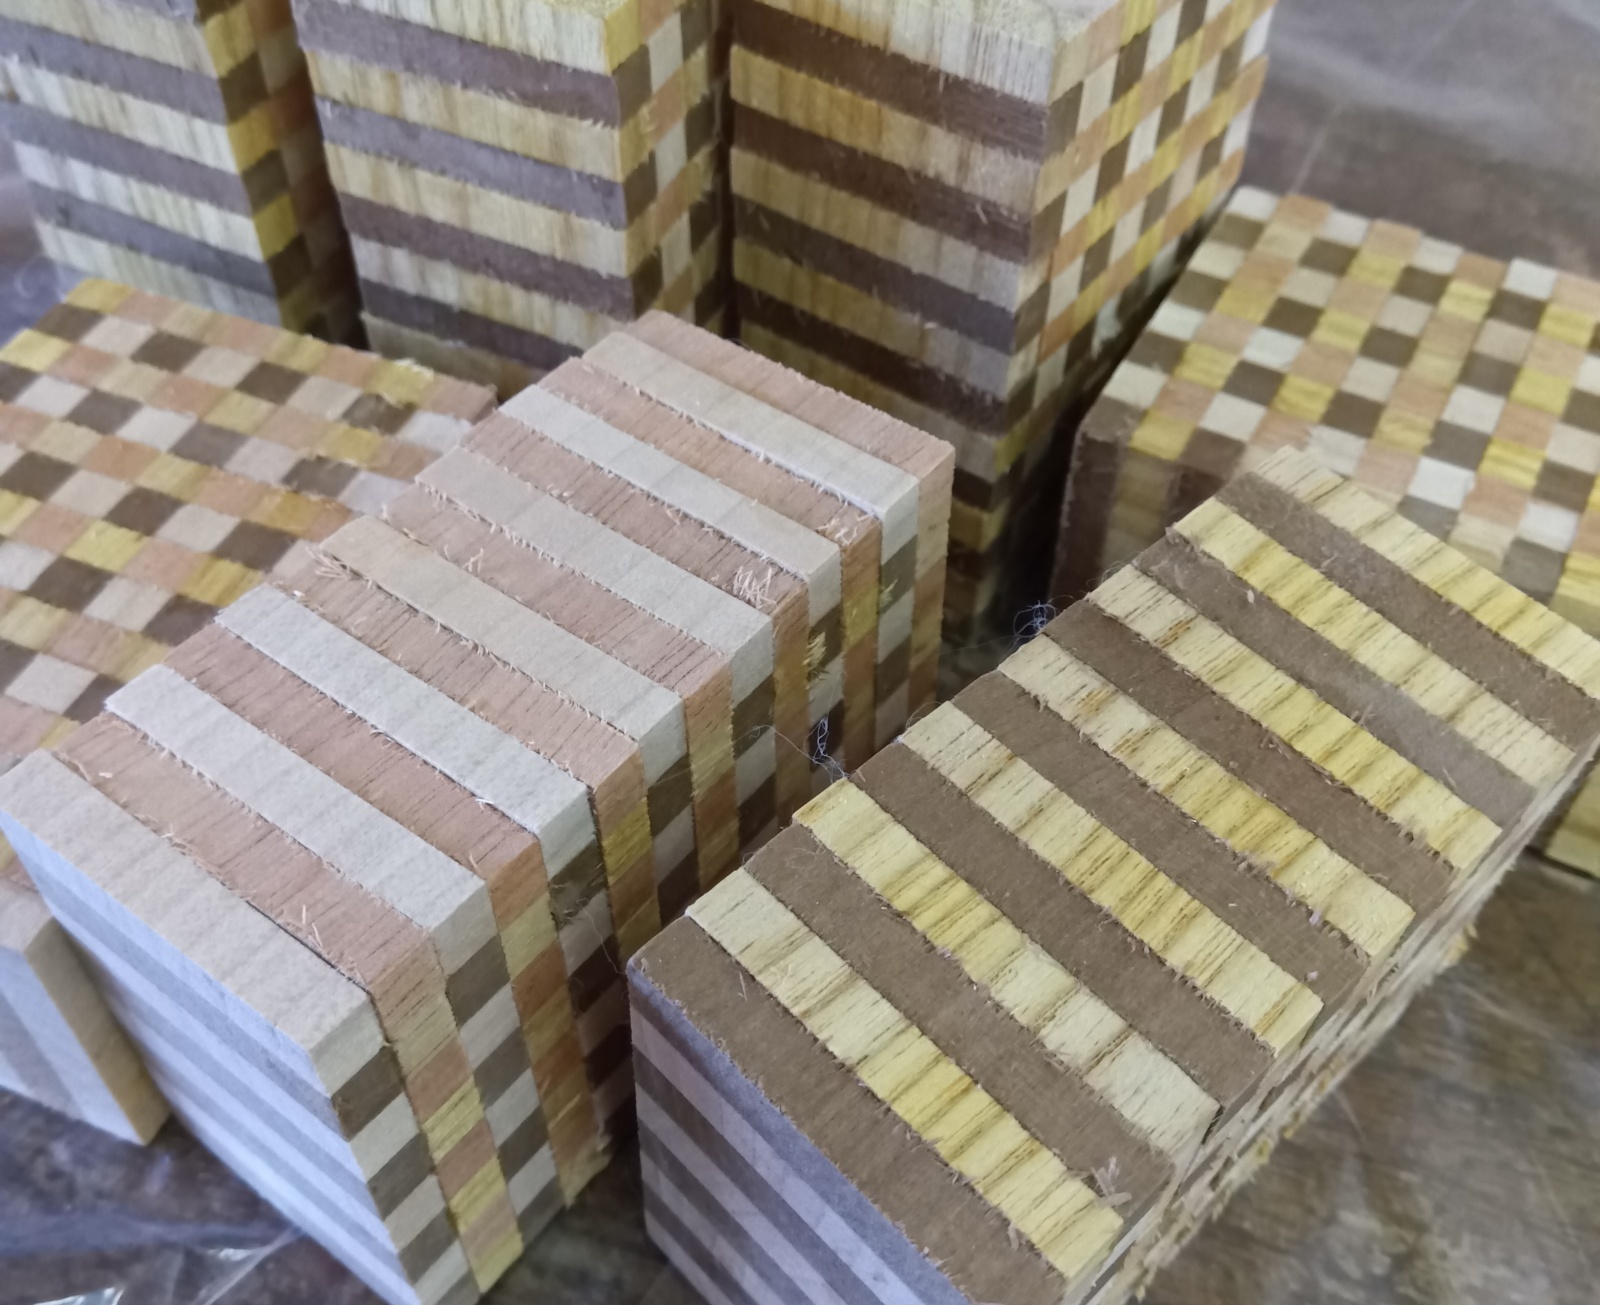
The photo shows these small pieces glued together into one block. I stacked and glued 14 thin pieces on top of each other. I make seven of these blocks, then glue them side by side to form a long strip. The amount depends on the size of the yosegi sheets I want to make. This time, I am making a sheet about 6 cm wide and 34 cm long, so this is the right amount. I took the photo a bit close up, so it might be a little hard to see, but you can notice that there are small steps on the side where the pieces are glued together. These pieces are made by gluing eight layers of two different types of wood and then cutting them into flat boards. I make two versions with different color combinations. In the photo, they are the white and gray type, and the yellow and beige type. When making these boards, I clamp them with a vise. Even though I try to apply the same pressure, the hardness of the wood is different. The softer wood gets compressed a little more, so even if I stack eight layers of the same thickness, the final width ends up slightly different.
If I leave it like this, I won’t be able to glue them neatly side by side, so I shave down the raised parts and make the surface flat. Of course, this means that each small pattern piece becomes slightly smaller, but that can’t be avoided. So I try to remove only the minimum amount needed to make it flat. Sometimes, I still glue them even if a very slight step remains. The most important thing is to keep the size of the pattern pieces as consistent as possible. This kind of balance is something I always deal with in yosegi work. When joining finished patterns together, I always need to shave them a little to get a clean fit. If they are not properly joined, the sheet can fall apart later. At the same time, making precise geometric patterns with woods of different hardness is quite difficult. So I try to use very sharp tools when making the parts, and I make the first small pieces as accurately as possible. That accuracy helps a lot when building up into larger patterns later.
By the way, I have decided on my next piece. I will be making 3-sun 18-steps puzzle boxes next. I don’t have enough of this checkerboard pattern for it, so I am working on it a bit quickly.