Notes on one-point yosegi
Perhaps this is the cold period of "sankan shion". Today felt like we had gone back to winter again. I spent the whole day working in the workshop as usual. Yesterday the Mame puzzle boxes were completed successfully, and today it was the turn of the 3-sun 12-steps puzzle boxes that I had been making at the same time. I worked on the finishing process for them today.
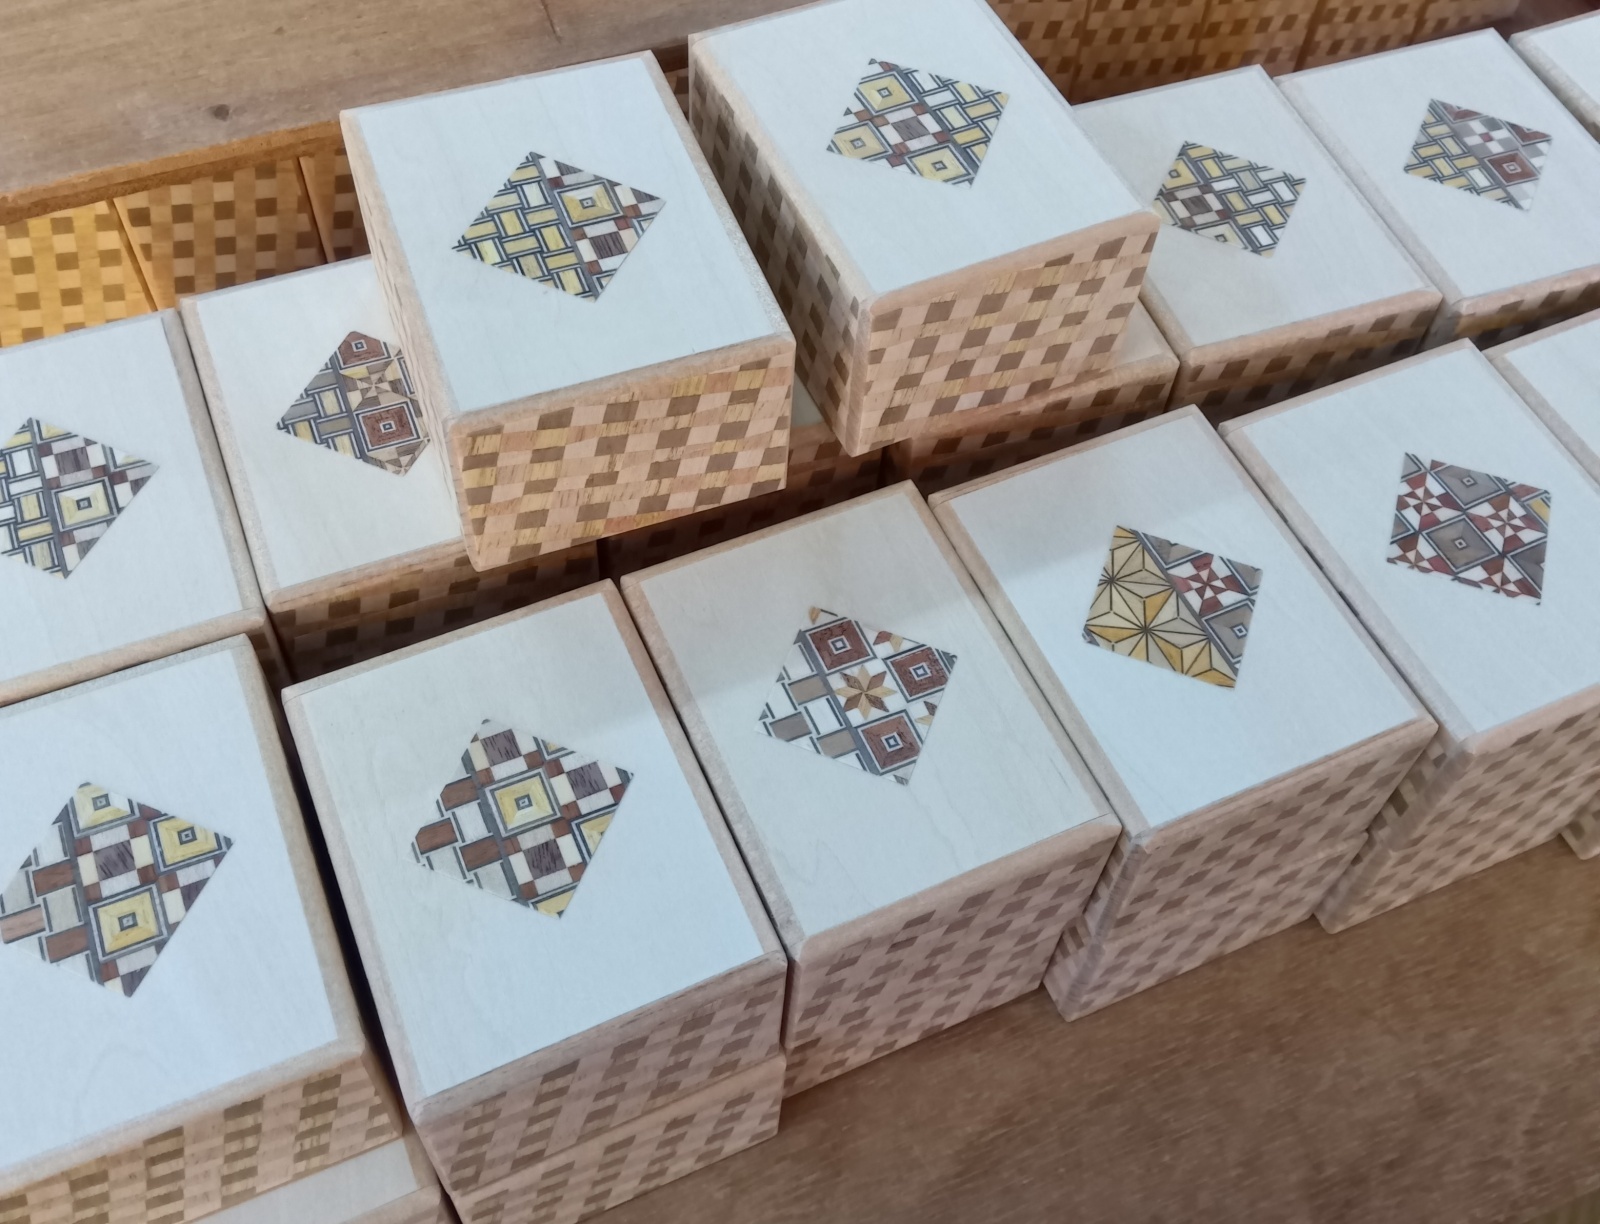
As usual, I began in the morning by rounding the corners of the boxes. This time all of the boxes use the type with ichimatsu yosegi sheets on the side panels, so I did this work on every box. After that, I made a few small repairs to the yosegi parts, and then in the afternoon, before the coating process, I attached the one-point yosegi pieces. When you see the finished product it is hard to notice, but the one-point yosegi sheets actually have a backing (called "urauchi" in Japanese) on the back side, and the back side becomes like a sticker. “Backing” means that paper is attached to the back of the yosegi sheet. This allows the yosegi sheet to be cut more easily and also helps the colors of the yosegi appear brighter. This kind of backing is not limited to these boxes. Many yosegi products sold in Hakone use the same method. Normally the yosegi sheet is simply glued onto wood, but when it needs to be applied to curved surfaces, for example, the backing makes the work much easier. and For these puzzle boxes, the backing paper is adhesive, so the yosegi piece can be attached directly onto the lid.
…At least, that was what I thought, but it did not go so smoothly. I have attached this one-point yosegi many times before, but when I used some yosegi pieces that had been made a few years ago and kept in storage, I noticed after a few hours that they were starting to peel off. As yosegi ages, it loses moisture and its elasticity. Normally, the sheet would probably have fallen apart by then. However, because these small pieces had backing paper attached, they still looked normal, and I did not realize how dry they had become. At most, I thought the sheet felt a little stiff. But in fact, the curling force of the dried yosegi was stronger than the adhesive of the sticker, and it peeled away. Since discovering this, I now apply glue to the back of the one-point yosegi sheet, on the adhesive surface, before attaching it. After that, I use heat and pressure to fix it firmly in place. With this method, it no longer peels off at all. Come to think of it while writing this, since I now apply glue to the back, the adhesive backing paper may no longer be necessary. Even after it is securely attached, the work is not finished. I lightly sand the entire yosegi piece with fine sandpaper. By doing this, the sharp corners of the square yosegi become slightly rounded, which helps prevent them from catching and peeling off later. So this small one-point yosegi actually requires quite a bit of work...😅 After all that, I was able to complete the undercoating successfully.