Kannuki panels
The heat is getting stronger day by day, and today feels like the hottest day of the year so far in our area.
In the morning, while it was still “not too hot” (though still very warm…😂), I worked on making parts using the woodworking machines and processing the main body of the boxes. In the afternoon, I moved on to attaching the parts.
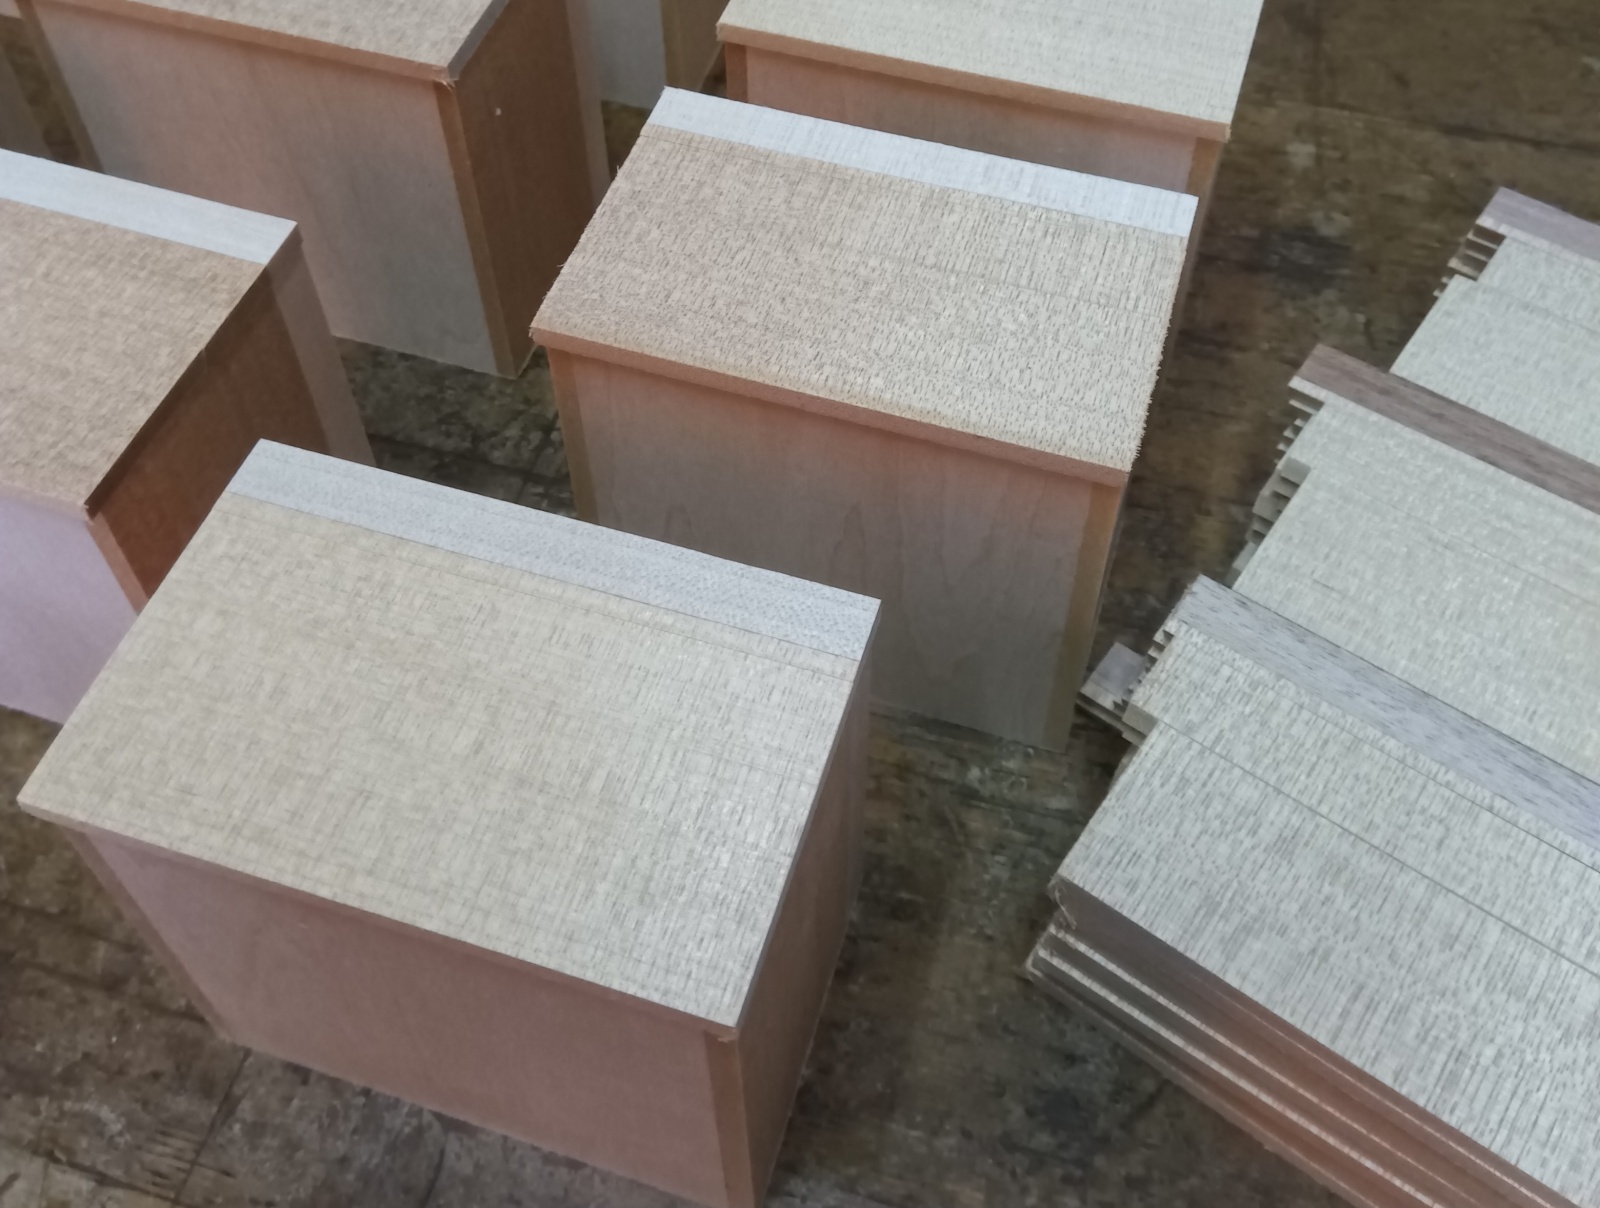
Today, I focused on making and attaching the Kannuki (slide key) panels, which are the sliding lock panels, for the square-type puzzle boxes. This time, as you can see in the photo, everything is made from solid wood. Even though the wood has a light color, the Kannuki parts are well hidden, making it harder to guess where the mechanism is.
This brings up a common topic among Japanese puzzle box (himitsu-bako) makers — the Kannuki panel is often a challenge to design well.
One long-standing issue is that people can tell where the Kannuki is just by looking at the panel. Of course, if it’s not find at all, it would be impossible to solve the puzzle. But the problem is that the Kannuki often becomes noticeable due to the way the Yosegi pattern doesn’t line up cleanly — what we call “pattern misalignment.”
Let me explain a bit more: the Kannuki panel is actually made from one panel that is cut into three parts. The middle, narrower piece slides sideways — this is what we call the Kannuki.
To make this, we first attach a Yosegi sheet to a board. Then, using a saw (now usually mounted on a woodworking machine), we cut the board into three pieces. However, the saw blade is around 1.0 to 1.3 mm thick, depending on the maker. That small thickness removes part of the Yosegi pattern. So when the three pieces are placed side by side again, the pattern no longer lines up perfectly — it looks slightly shifted.
Once those three cut pieces are attached to the side of the box, the misalignment makes it obvious where the moving part is.
Most customers may not immediately realize “this is the moving part,” but they do notice that “the pattern looks off,” which leads to dissatisfaction. I’ve received such comments a few times myself.
Currently, as long as we are using traditional continuous Yosegi patterns and the standard method of cutting the panels, there is no perfect solution. So, puzzle boxes with slightly misaligned patterns have become the norm, and many are sold that way.
Using a thinner saw blade can help minimize the shift, but using something like a 1 mm blade can make it difficult to get a clean, straight cut, and may lead to other problems. It’s a tough balance to manage.
That’s why I personally like working with solid wood panels. Of course, if we were to create a special Yosegi pattern specifically made to hide the cut lines, and spent more time and effort on the process, we could avoid this misalignment.
However, doing so would increase the production time and cost, making it hard to balance with the final product price.
I still think this is an area worth researching further in the future 🧐
In the morning, while it was still “not too hot” (though still very warm…😂), I worked on making parts using the woodworking machines and processing the main body of the boxes. In the afternoon, I moved on to attaching the parts.
Today, I focused on making and attaching the Kannuki (slide key) panels, which are the sliding lock panels, for the square-type puzzle boxes. This time, as you can see in the photo, everything is made from solid wood. Even though the wood has a light color, the Kannuki parts are well hidden, making it harder to guess where the mechanism is.
This brings up a common topic among Japanese puzzle box (himitsu-bako) makers — the Kannuki panel is often a challenge to design well.
One long-standing issue is that people can tell where the Kannuki is just by looking at the panel. Of course, if it’s not find at all, it would be impossible to solve the puzzle. But the problem is that the Kannuki often becomes noticeable due to the way the Yosegi pattern doesn’t line up cleanly — what we call “pattern misalignment.”
Let me explain a bit more: the Kannuki panel is actually made from one panel that is cut into three parts. The middle, narrower piece slides sideways — this is what we call the Kannuki.
To make this, we first attach a Yosegi sheet to a board. Then, using a saw (now usually mounted on a woodworking machine), we cut the board into three pieces. However, the saw blade is around 1.0 to 1.3 mm thick, depending on the maker. That small thickness removes part of the Yosegi pattern. So when the three pieces are placed side by side again, the pattern no longer lines up perfectly — it looks slightly shifted.
Once those three cut pieces are attached to the side of the box, the misalignment makes it obvious where the moving part is.
Most customers may not immediately realize “this is the moving part,” but they do notice that “the pattern looks off,” which leads to dissatisfaction. I’ve received such comments a few times myself.
Currently, as long as we are using traditional continuous Yosegi patterns and the standard method of cutting the panels, there is no perfect solution. So, puzzle boxes with slightly misaligned patterns have become the norm, and many are sold that way.
Using a thinner saw blade can help minimize the shift, but using something like a 1 mm blade can make it difficult to get a clean, straight cut, and may lead to other problems. It’s a tough balance to manage.
That’s why I personally like working with solid wood panels. Of course, if we were to create a special Yosegi pattern specifically made to hide the cut lines, and spent more time and effort on the process, we could avoid this misalignment.
However, doing so would increase the production time and cost, making it hard to balance with the final product price.
I still think this is an area worth researching further in the future 🧐