Yosegi and Solid Wood Side Panels
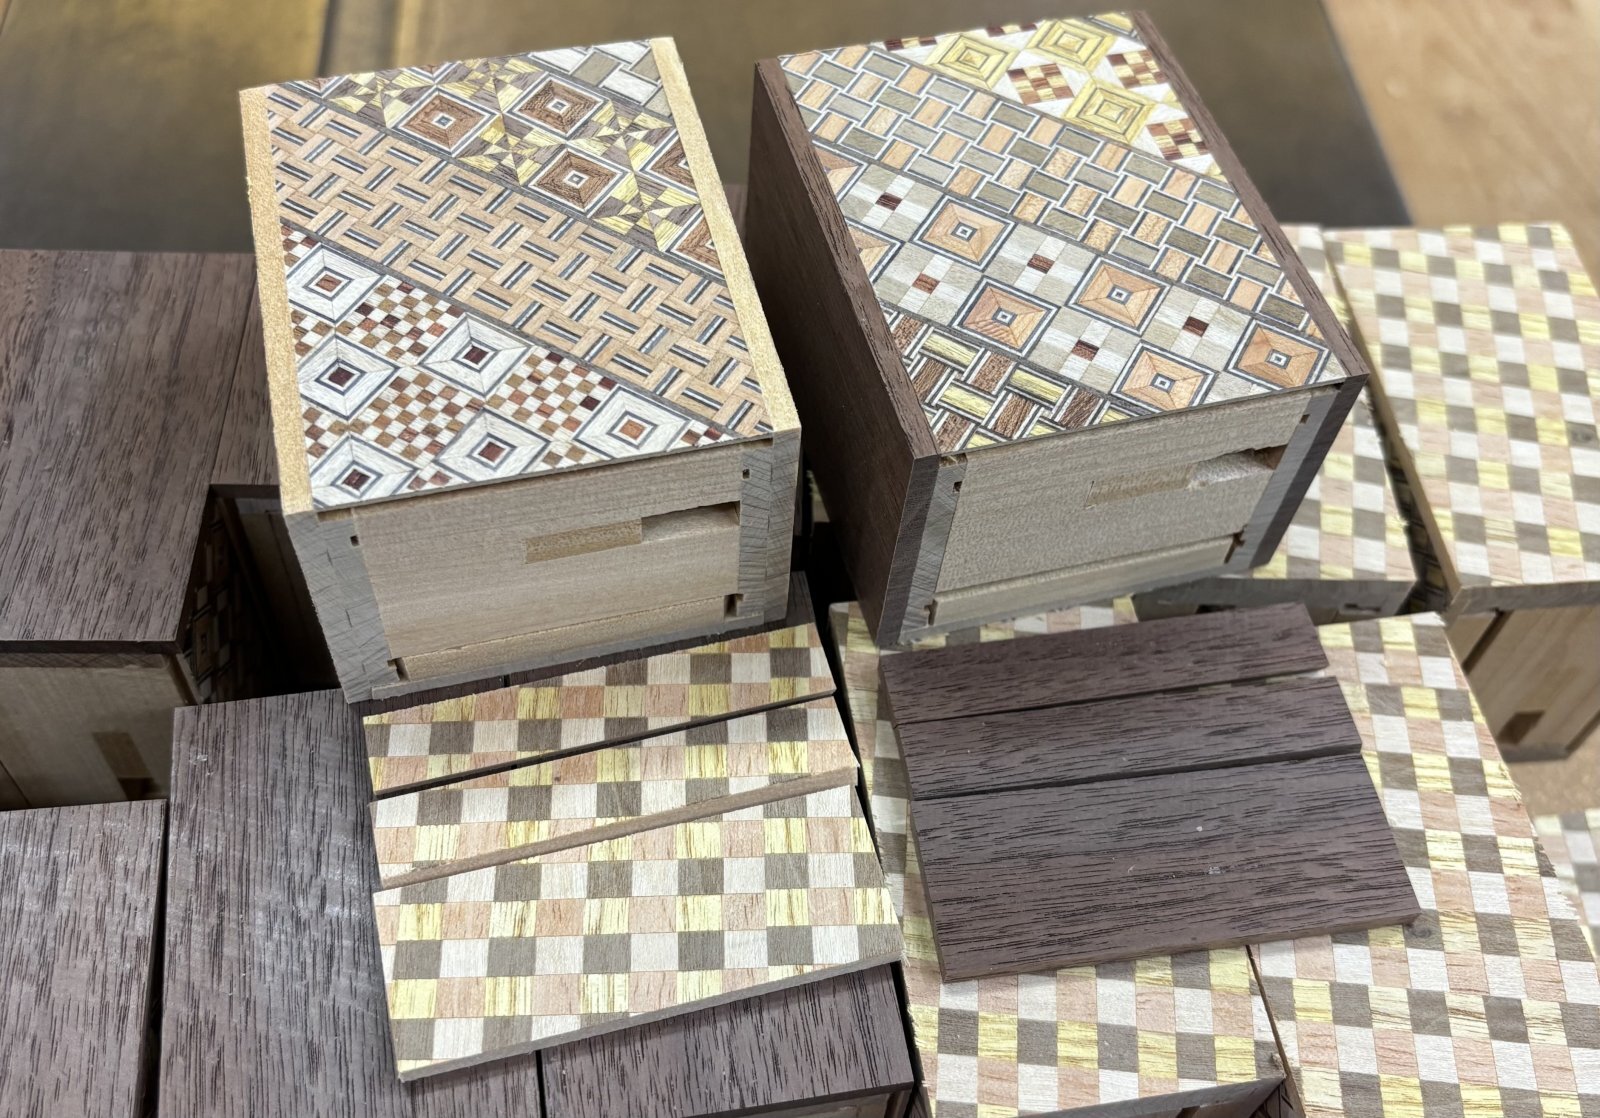
A new week has begun, and the mornings and evenings have become much cooler. Around this time of year, the rain usually eases and the air becomes drier, so it may be a good season for making puzzle boxes. I spent the whole day working in the workshop. The main bodies of the 5-sun puzzle boxes with drawers were already finished, but the drawers themselves still needed a little more work. I finished that work today, and they are now ready to be fitted into the boxes. However, I left that for another day and worked on the 3-sun boxes and some other tasks instead.
The photo shows part of the work involved in attaching the sliding key panels to this batch of 3-sun boxes. Most have traditional Yosegi on the top and bottom with Walnut sides, but I have also included a small number with checkered Yosegi sides by request. I am working on both types together. The mechanisms are the same, but attaching the sliding key panels requires a slightly different approach for each design. The checkered Yosegi panels are made by gluing Yosegi sheets onto Agathis panels, so I work with them in much the same way as panels covered with traditional Yosegi. This is probably the most common way of making Yosegi puzzle boxes. It may be difficult to see in the photo, but on the box with checkered Yosegi sides on the left, the side panels extend slightly above the top panel at this stage. The difference is so small that you can only just feel it with your fingers—perhaps about 0.1--0.2 mm. I leave this small amount on purpose. Of course, the box will not be finished like this. During the final stage, when I round the edges, I remove this extra material at the same time. If the panels stick out too far, removing it becomes difficult, so I leave only a very small amount.
By comparison, on the model with Walnut side panels on the right, I remove the extra material at this stage, before attaching the sliding key panels, so that the side panels are level with the top panel. This is a very delicate process. None of the raised edge should remain, but I must also avoid removing too much and leaving the side panels lower than the top panel. However, each box is slightly different, so to make sure no raised edge remains on any of them, I aim to remove just a tiny bit extra. This work is done entirely by feel. I leave the side panels so slightly lower that someone else would probably not be able to tell whether they were higher or lower simply by running a finger over them once. If even a small raised edge remains, many people would think I had not finished the work properly. So, if I have to choose, leaving the side panels just a little lower gives the box a cleaner, more beautiful finish.
There are also some differences in how I make the sliding key panels, but this post is getting a little long, so I’ll leave that for another time...😅